
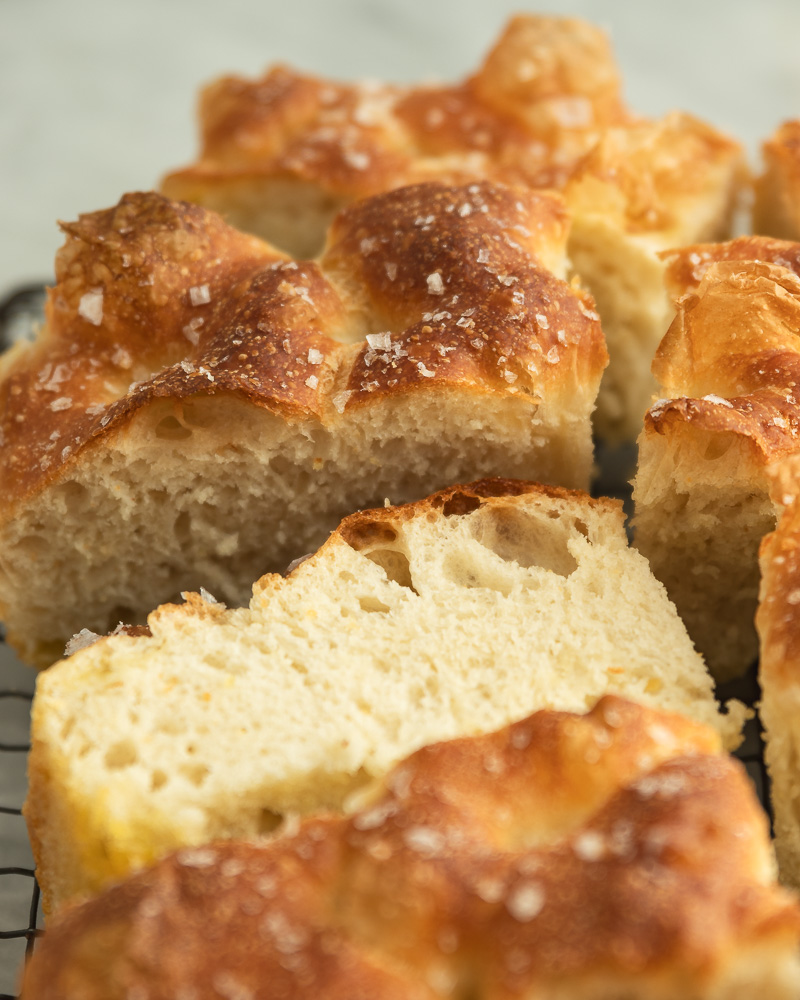
A super easy, no-knead dough transforms into the softest, thickest, bubbliest Sourdough Discard Focaccia ever! This focaccia is perfect for serving alongside your favorite soups, stews, pastas or for turning into garlic bread, deep dish pizza, or the most epic sandwiches.

Recipe Background and Details
When I set out to create a sourdough focaccia I never imagined it would be this amazing. I've had focaccia on my to-do list forever, and when King Arthur Baking announced focaccia as their 2025 recipe of the year, I was inspired to move it to the top of the list. So I took my Sourdough Discard Pizza Crust recipe, made a few adjustments, and voila, I had the most glorious, bubbly focaccia I've ever seen. I mean, I really can't get over the bubbles and I definitely took way too many photos of them.

Jump to:
Ingredients and Substitutions
You will just need a few simple ingredients to make this dough.
- water: lukewarm for blooming the yeast.
- yeast: active dry yeast or instant will both work (you can leave the yeast out and make this with active starter as well - see notes section of recipe card)
- sugar or honey: To add flavor and softness to the dough.
- salt: For flavor. I always use Diamond Crystal kosher salt.
- sourdough starter: This is designed as a discard recipe but you can use active starter with the yeast and you'll end up with a fluffier, more bubbly dough. If you want to use just sourdough and no yeast, I give those instructions below and in the notes section of the recipe card.
- olive oil: A good flavorful one since we are using so much and it really does flavor the focaccia.
- bread flour: I really do think this is best with bread flour but if you only have all purpose it will work just fine.
See recipe card for quantities.


Step-by-step Instructions
This easy no-knead dough mixes up with just a bowl and a dough whisk or wooden spoon. Over the first hour you'll perform a few stretch and folds to build up dough strength. If you are short on time, you can just knead the dough by hand for a few minutes and skip that step, or you can mix the dough in a stand mixer for 5-7 minutes and then let it rise undisturbed. I just really love watching and feeling the dough transform throughout the stretch and fold period.
Make the sourdough discard focaccia dough

Sprinkle sugar and yeast over warm water in mixing bowl, stir and allow to sit for 5 minutes.

Add sourdough starter to yeast mixture and stir.

Next, add olive oil and salt and stir.

Add flour to wet ingredients.

Stir with a dough whisk or wooden spoon until combined

Form into a shaggy dough ball, cover, and let rest for 15-20 minutes.
Stretch and Folds
- Over the next hour, perform a set of stretch and folds every 15-20 minutes.

Grab one side of the dough and gently but firmly pull up.

Stretch the dough up out of the bowl.

Fold the stretched piece of dough over the rest of the dough and repeat with remaining 3 sides of dough. This is one set of stretch and folds.
First Rise
- After an hour of stretch and folds, cover and allow dough to rise until doubled. Or place dough in refrigerator for up to 24 hours. See Make Ahead heading for more details.

After last set of stretch and folds, form dough into a ball, cover, and allow to rise for an hour or until doubled.

After one hour the dough will be doubled, bubbly, and airy.

Transfer dough to prepared pan.
Second Rise and Shaping

Spread dough out evenly into prepared pan, cover, and allow to rise.

After 60-90 minutes dough will be doubled and will have mostly filled the pan.

Drizzle dough with olive oil and use your fingers to dimple the dough all over before baking.
Hint: When dimpling the dough, press your fingers all the way through to the bottom of the pan. This will give the best dimples after baking.
Can I make this without yeast?
Yes - if you want to use active, bubbly sourdough starter you can omit the added yeast and increase your rising times significantly: until doubled during the first rise/bulk ferment and then again until doubled and very bubbly for the second rise These times will vary depending on your starter and the temperature of your kitchen so pay attention to the dough rather than the clock.

Pan Size and Flavor Variations
If you don't want a 9x13 pan of focaccia, you can cut the recipe in half and use an 8x8 or 9x9 square pan, 9-inch round pan, or a 9 or 10 inch cast iron skillet.
Flavor the focaccia any way you like. Olives, rosemary, parmesan or other cheeses, sun-dried tomatoes, dried figs, roasted garlic cloves, fresh garlic slices, or any herbs and seasonings you enjoy on focaccia. You'll want to add the toppings before dimpling and press them in as you dimple the dough.
Make Ahead and Storage
To make ahead, prepare dough through the stretch and folds then cover tightly and transfer to the refrigerator for up to 24 hours. When ready to bake, spread cold dough into prepared baking pan and allow to rise according to recipe instructions. Keep in mind the rising time will be longer since the dough is cold.
Like all breads, focaccia is best eaten fresh the first day, but if you have leftovers, store them in an airtight container and warm before serving.
Related - more sourdough recipes
Looking for other recipes like this? Try these:
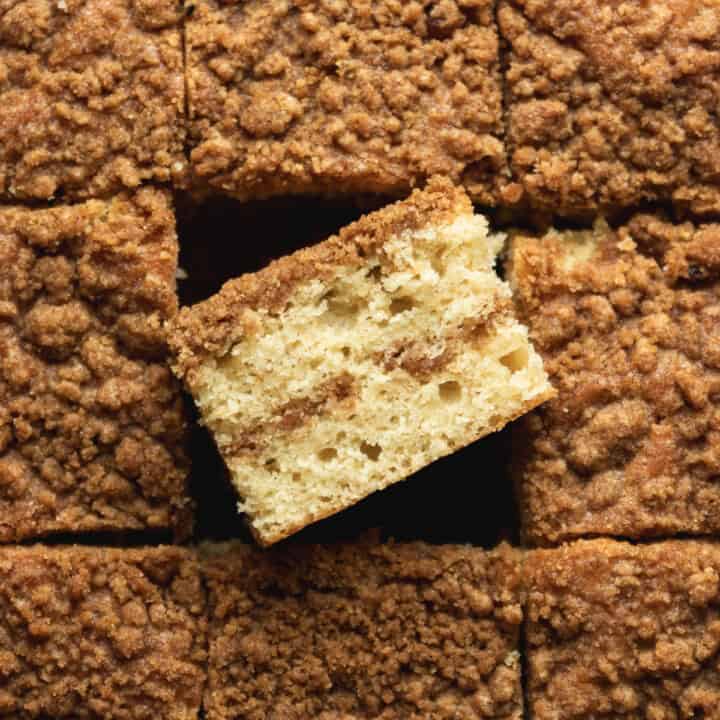
- Sourdough Discard Coffee Cake
- Sourdough Peach Cobbler
- Triple Lemon Sourdough Scones
- Sourdough Discard Waffles


Sourdough Discard Focaccia Recipe
A super easy, no-knead dough transforms into the softest, thickest, bubbliest Sourdough Discard Focaccia ever! This focaccia is perfect for serving alongside your favorite soups, stews, pastas or for turning into garlic bread, deep dish pizza, or the most epic sandwiches.
- Total Time: 3 hours
- Yield: 1 9x13 rectangle focaccia
Ingredients
360 grams warm water - about 100 degrees F (1 ½ cups)
1 tablespoon sugar
2 ¼ teaspoons yeast
113 grams sourdough starter (discard or active) (½ cup)
2 teaspoons kosher salt
2 tablespoons olive oil for dough
480 grams bread flour (4 cups)
4 tablespoons olive oil for pan and topping
flaky sea salt for topping
Instructions
- Add warm water to a large mixing bowl. Sprinkle over sugar and yeast and stir. Let sit for 5 minutes or until you see some foaming.
- Add sourdough starter, olive oil, and salt and stir to combine.
- Add flour and mix with a wooden spoon, dough whisk, or by hand until a shaggy dough forms with no flour visible.
- Cover and rest for 15 minutes before performing first set of stretch and folds (detailed instructions and photos are in blog post). Repeat this every 15 minutes for the next hour. So you will perform 4 total sets of stretch and folds.
- After last set of stretch and folds, cover dough and allow to rise at room temperature for 1 hour until doubled in size. Or cover and place in the refrigerator for up to 24 hours (see make ahead option in notes section below).
- Prepare pan while dough rises: generously oil a 9x13 baking dish with olive oil and line with a sheet of parchment paper so that the edges hang over the long sides of the pan. This will prevent sticking and help lift the focaccia out later. Use a metal pan for an extra crispy and browned bottom and sides. If you use a ceramic baking dish you will not get as much browning.
- After dough has doubled, transfer to prepared pan and press into an even layer that covers the pan. You can stretch the dough a bit to make it fit.
- Cover and allow the dough to rise again until doubled and very puffy. This will take 60-90 minutes.
- Preheat oven to 425 degrees F with a rack in the lower third during last 20 minutes of rising time. If you have a baking stone or steel this is a great time to use it.
- When dough has risen, drizzle with 3 tablespoons of olive oil (and any optional toppings). Press your fingertips into the dough making the signature focaccia dimples all over the dough. Press all the way down and through the dough so you feel the bottom of the pan.
- If you have not added any toppings, simply sprinkle with flaky sea salt after dimpling and bake in preheated oven for 25-35 minutes until golden brown and baked through. The internal temperature should be between 190 and 210 degrees F. If desired, tent loosely with foil or parchment after 15 minutes to prevent any toppings from becoming overly browned or burnt.
- Optional finishing touch: If you used a ceramic or glass pan and you want to get a crispier bottom, remove focaccia from pan and return directly to lower rack of oven with oven still hot but turned off for 7-10 minutes until desired doneness. I learned this trick from King Arthur and it's very smart and totally works!
Notes
- Don't rush the second rise. Let the focaccia dough get very puffed, light, and jiggly and really fill the pan - King Arthur totally nails it and calls it "marshmallowy" which is precisely how it should look and feel. Depending on your kitchen temperature, this could take an hour or even more if you have a cooler kitchen.
- To make ahead, prepare dough through the stretch and folds then cover tightly and transfer to the refrigerator for up to 24 hours. When ready to bake, spread cold dough into prepared baking pan and allow to rise according to recipe instructions. Keep in mind the rising time will be longer since the dough is cold.
- If you don't want a large 9x13 pan of focaccia, you can cut the recipe in half and use an 8x8 or 9x9 square pan.
- For a larger, flatter focaccia, use a half sheet pan (18x13 inches). Check the focaccia after 20 minutes as it will cook faster in a larger pan.
- Flavor the focaccia any way you like. Olives, rosemary, parmesan or other cheeses, sun-dried tomatoes, dried figs, roasted garlic cloves, fresh garlic slices, or any herbs and seasonings you enjoy on focaccia. You'll want to add the toppings before dimpling and press them in as you dimple the dough.
- if you want to use active, bubbly sourdough starter you can omit the added yeast and increase your rising times significantly: until doubled during the first rise/bulk ferment and then again until doubled and very bubbly for the second rise. These times will vary depending on your starter and the temperature of your kitchen so pay attention to the dough rather than the clock.
- Prep Time: 2 hours
- Cook Time: 25 minutes
- Category: sourdough, breads
- Method: sourdough, baking
- Cuisine: American
Andrea says
Used active started instead of yeast. Came out perfect.
Deanna says
When you say, “now is the time to use your baking stone” do I set my baking pan directly on the stone?
anita | wild thistle kitchen says
Hi Deanna. Yes, if you have a baking stone, place it in the oven and preheat it while the oven preheats. Then bake your risen focaccia (in the pan) on it for a nice crispy crust. 🙂 Let me know if you have any other questions. - Anita
Allison C says
Amazing. First of all, this tastes great and goes well with everything. This recipe is so much quicker than other recipes, without sacrificing anything in my opinion. My starter was pretty active the first time I made this and it came out great. Will definitely be a regular recipe over here.
anita | wild thistle kitchen says
Hi Allison! I am so happy you loved this recipe! Thank you for making it and for coming back to leave this feedback, sweet comment, and amazing rating! I appreciate it so much!! - Anita