
If you are interested in beginning your sourdough journey and want to know How to Make a Sourdough Starter from scratch but are overwhelmed by all of the details, this guide is for you! I was in your shoes in 2019 and I promise I really do know how you feel. Sourdough is not as complicated or as intimidating as it is made to seem. In this laid back Sourdough Starter Guide I will walk you through the simple process of how to make a sourdough starter, what to do with the discard, and what to do when you need a break. Plus, I'll share my sourdough journey (because I think the background is important!), give you plenty of tips, recipe ideas, troubleshooting, etc. Let's do this!
Since I started sharing sourdough and sourdough discard recipes, I have received many requests for a sourdough starter recipe and I am happy to oblige! There are a lot of guides like this out there, but my experience with sourdough is unique and valuable, just like yours will be, and I like the idea of sharing and preserving that here.
Once your starter is established, head over to my How to Feed and Maintain a Sourdough Starter for long-term care info and TONS of sourdough starter info and faqs.
My Sourdough Journey
how it started
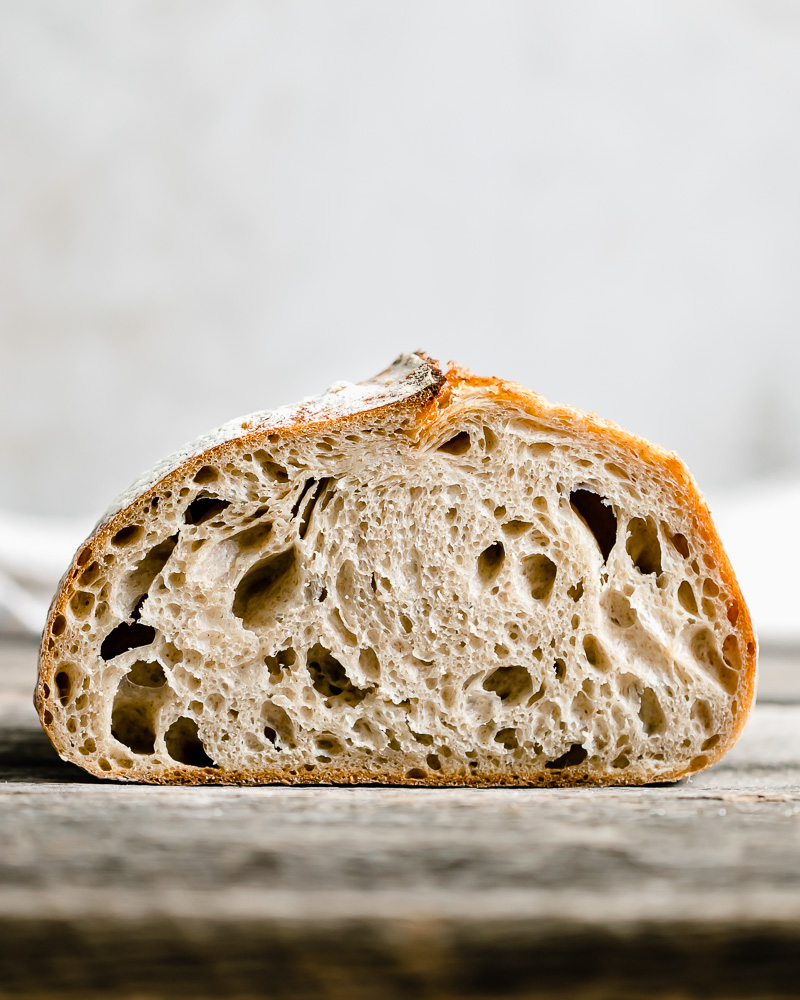
I jumped into sourdough in late 2019/early 2020 - yep, right before the whole world changed. I was so intrigued by the idea of sourdough baking for so long before I finally decided to just go for it. So, I scoured the internet for info, ordered some fancy, artisanal flours, dusted off my neglected kitchen scale, scoured the internet for more info and took more notes than I would ever need, and got to it. In about seven days I was the very proud momma of a beautiful, bubbly sourdough starter that I have kept alive all these years. Over the next few months I made several really beautiful loaves of bread (see below for my first sourdough loaf!) and became pretty comfortable with the sourdough process. But then I stopped. I shoved my starter to the back of the refrigerator and I took a really, really long break.
and how it's going
When I came back to sourdough after that much-needed break, I took a wayyyy more laid back approach. I realized why I took such a long break. The process I was following was just too stressful and rigid. That's just not the way I cook and bake. It is just yeast! If you really break it down, sourdough starter is yeast and it is used in the same way as commercial yeast, you just need to give it more time to rise. I think the snobbery and rigidity that surrounds sourdough baking is absurd and it drives people away from a beautiful, satisfying process and hobby.
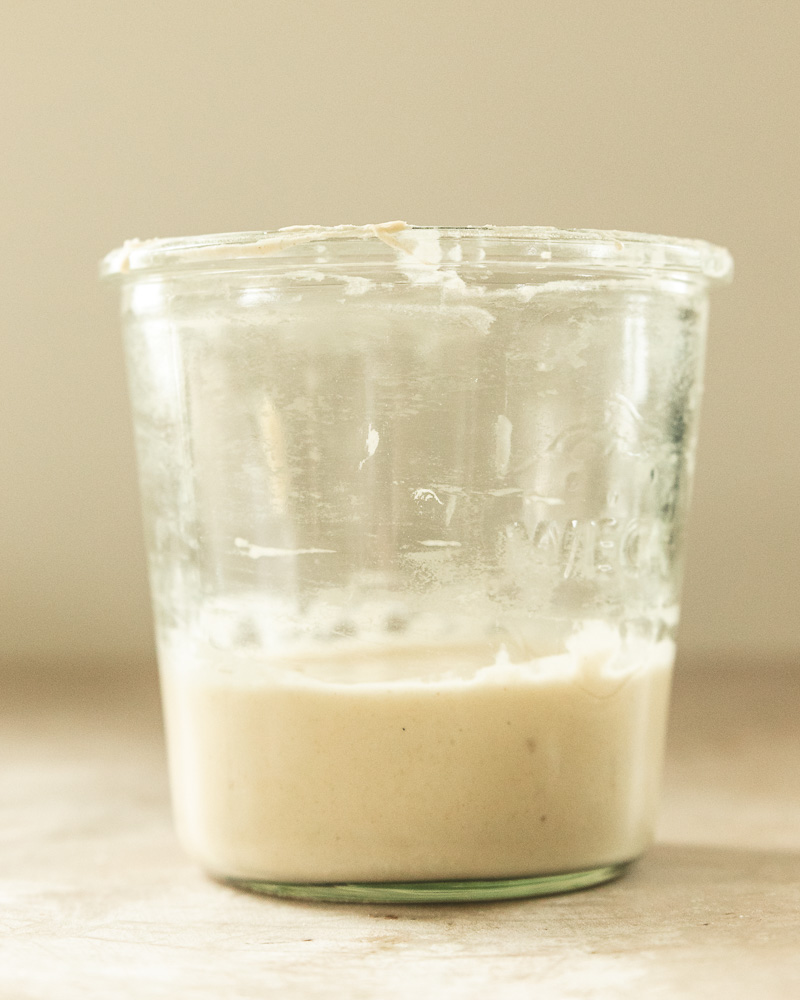
So in this sourdough starter guide I will tell you how to make it really easy! I'll give weight measurements too because I know many bakers will want them and there is nothing wrong with that. But I will also give cup measurements because I firmly believe that you do not need a kitchen scale to establish or care for a sourdough starter. See below for my active, bubbly, 7+ year old starter. I think she enjoys my laid back attitude.
Jump to:
- My Sourdough Journey
- What is the Best Flour for Sourdough Starter?
- And Speaking of Wild Yeast
- Can I Switch Flours?
- What Temperature is Best for Sourdough Starter
- What You Need to Create a Sourdough Starter (Ingredients and Equipment)
- How to Make a Sourdough Starter
- Making a Sourdough Starter Without a Scale
- Sourdough Discard: Important info
- When is My Sourdough Starter Ready to Use?
- Top Tips
- Easy Beginner Sourdough Starter Recipe
What is the Best Flour for Sourdough Starter?
I am using organic unbleached all-purpose flour for the starter you see in this post. You can use nearly any flour to make and/or feed a sourdough starter. Back in 2019, I started out using a combo of whole wheat flour, bread flour, and rye flour as some of the sourdough experts insisted I must do. But then I started using good old all-purpose and never looked back. I have also used einkorn flour - both whole grain and all-purpose - with great success. I even used bleached flour during the height of the flour shortage in 2020 and guess what, it worked. I've used everything from basic grocery store brands to the fanciest Janie's Mill and specialty King Arthur Flour varieties. My point is, use what you prefer and just know that those hungry, wild yeasties will adapt to whatever flour you choose.
And Speaking of Wild Yeast
When you first start out on your sourdough journey, your kitchen will have little or no wild yeasts floating around. As you progress, these special little organisms will begin to multiply in your kitchen and your starter and baked goods will reflect that. Be careful not to go overboard with bleach, disinfecting sprays, or wipes and cleaners with harsh ingredients and fragrances - you want a clean kitchen but you also want a yeast-friendly environment.
Can I Switch Flours?
Yes, you can switch the types of flours you feed your sourdough starter with once your starter is established. It might take the starter a day or two to adapt but it will. I started out with a combination of flours and eventually switched to 100% all purpose flour (I use organic, unbleached). But at this point my starter probably has itty-bitty bits of a dozen different flours.
What Temperature is Best for Sourdough Starter
If you do a quick internet search, you'll find a range of anywhere from 68-85 degrees as the recommended "ideal" temperature for sourdough starter. I live in a drafty 1889 farmhouse and the first starter I ever made (that is still alive and well today) was made in January with snow on the ground. I left my jar on the countertop throughout the entire process. I'm not saying a warm place doesn't help speed up the process, but a cool kitchen is totally fine.
If you want to create a warmer spot here are some options:
- If your stove/oven has a pilot light that is always on, place your starter on top of your stove in between the burners.
- In a cabinet above your refrigerator.
- In the oven with the light on.
- Near a heating vent, radiator, or wood stove - make sure it isn't too hot as this will actually kill your starter.
- If all else fails and you want a warmer spot, order a heating pad. Try to find one with a low setting that doesn't shut off automatically.
What You Need to Create a Sourdough Starter (Ingredients and Equipment)
Ingredients:
- flour: I used organic, unbleached, all-purpose flour for this starter. See the Can I Switch Flours and What is the Best Flour for Sourdough Starter sections for more info on flours.
- water: I use water filtered through my Berkey, but you can use tap or bottled water. If your water is treated/chlorinated you can still use it but you should plan ahead. Fill a pitcher with water and let it sit overnight in order for the chlorine to dissipate.
- time and patience: Quite possibly the most important ingredients.
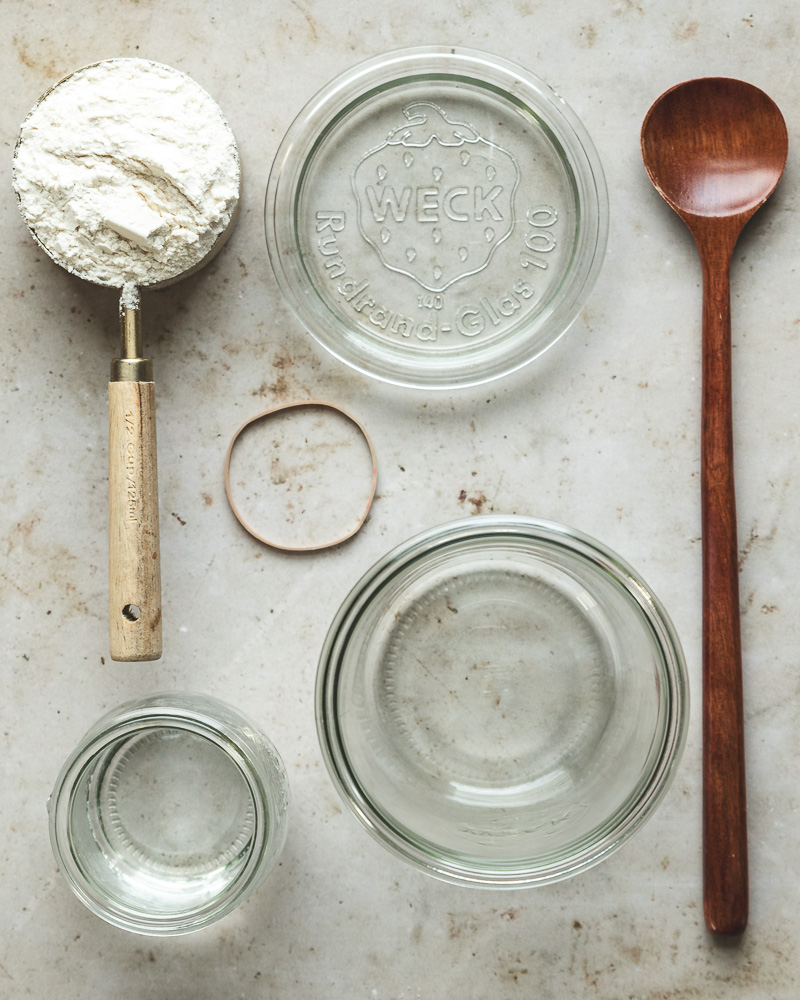
Equipment:
- glass jar with lid: 20 or so ounces or 740 or so liters is a good size. You'll need 2 if you plan to save your discard. I like these Weck Jars and these Le Parfait Jars.
- wooden or silicone spoon/spatula: I like these long handled wooden spoons for getting down in the jar. A silicone spatula is nice for cleaning up the sides.
- rubber band: optional but nice for keeping track of your starter's growth. You can also just mark the jar with a marker.
- kitchen scale: optional and not necessary for the starter, but will be handy if you really dive into sourdough baking (which is the whole point of this right??). This is the kitchen scale I use.
This post contains affiliate links. As an Amazon Associate I earn from qualifying purchases. Please feel free to check out my full disclosure policy.
How to Make a Sourdough Starter
- This process will take anywhere from 7 to 14 days. Mine took 9 days to become consistently bubbly and to smell pleasantly sour.
- For best results choose a warm spot such as inside your oven with the light on or in a cabinet above your refrigerator. *see What Temperature is Best for Sourdough Starter heading for more info and my thoughts.
- If you plan to use weight measurements, be sure to weigh your jars. Make a note of their weight so you can remove ½ of your starter without having to transfer jars each time.
- I wanted to show that this was possible using just all purpose flour. You will see results a little faster if you use a bit of whole wheat flour to start. You will still follow this exact same process and I do still recommend letting it go at least 7 days before you attempt a sourdough recipe, but I almost guarantee you will reach the bubbly, sour stage before 9 days if you replace a bit of the all purpose flour with some whole wheat flour.
Days 1-2:


- Day 1: Combine ½ cup (60 grams) flour with ¼ cup (60 grams) water in a glass jar. Stir well, scrape down sides, cover, come back in 24 hours.
- Day 2: Remove ½ of starter mixture, either discard or save in a separate container if you plan to use it, replenish starter with ½ cup flour and ¼ cup water. Stir, cover, come back in 24 hours.
Days 3-4


Now from here on the experience will vary for everyone. I will share my progress but just know that yours could look very different.
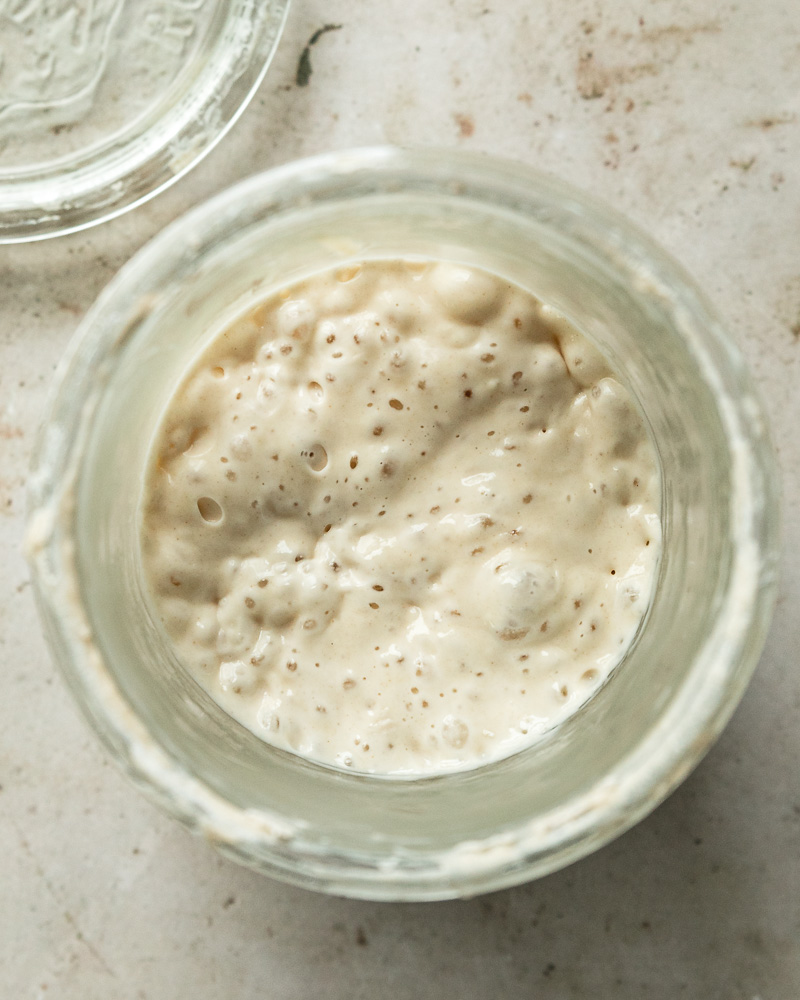
- Day 3: Mine was really bubbly on this day but still was not smelling sour at all. I discarded ½ and replenished.
- Day 4: As you can tell by the sides and top of my jar, the starter had really bubbled up on this day. But it still was not smelling sour. I discarded ½ and replenished.
Days 5-7


- Day 5: The starter barely grew but it had some liquid on top. This is a good sign! I discarded ½ and replenished.
- Day 6 and Day 7: Not much activity at all but I could see some bubbles/air pockets which is another good sign. On both days I discarded and replenished.
Days 8-14
At this stage, start monitoring your starter for doubling after 4-6 hours. If it hasn't doubled check again at the 12 hour mark. You'll have a good bit of yeast built up at this point, and by 24 hours your starter may have already risen, peaked, and fallen.


- Day 8: A bit of growth and some good bubbles. I discarded and replenished.
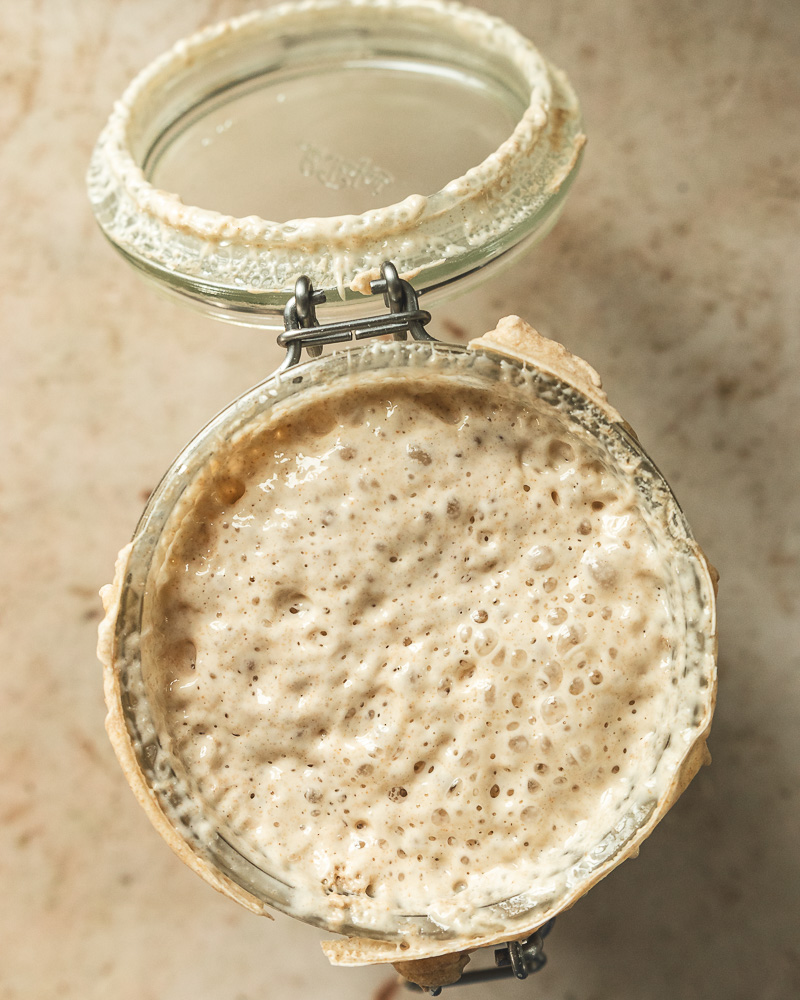
- Day 9: Today was the day! My starter doubled, bubbled, and had a beautiful sourdough smell.
Whether your starter is ready after 7 days or 9 days, it is never a bad idea to give it a few more days to really build up before baking. A full 2 weeks is recommended and this just ensures that you will get the best results when you begin baking.
Making a Sourdough Starter Without a Scale
½ cup of flour is equal in weight to about ¼ cup of water.* So if you always keep these measurements in the back of your head or scribbled on your kitchen calendar, you will never need a scale for your starter. Also, use the consistency as a guide - I like for mine to be about the texture of thick pancake batter and I rarely measure anymore. I just shake in some flour and add water until it is the texture I like. If it looks too thin, I add a bit more flour. If it looks too thick and pasty I add a splash more water. It really is that simple.
So to feed your starter in this beginning stage without a scale, all you have to do is remove half of the existing starter, and feed it with ½ cup flour and ¼ cup water. As you move forward in your sourdough journey, you can continue with this basic formula or find a formula/method that works better for your schedule. If you are planning to make a recipe that calls for a larger amount of starter, just bump up the amounts.
*In the sourdough world, equal weights of flour and water or starter, flour, and water are what is called 100% hydration sometimes written as 1:1 or 1:1:1 - this applies to the starter itself and also to bread recipes. So if you ever see a recipe that calls for that, now you know it's that simple!
Sourdough Discard: Important info
What to do with Sourdough Discard
There are so many ways to use sourdough discard! Even at this early stage when it is not really sour yet, you can toss it into a discard baking recipe. Make tortillas, flatbreads, crackers. Sourdough discard is especially good in pancake, waffle, or crepe recipes. You can even use your discard to thicken a soup, sauce, or gravy. I am not about to toss good flour in the trash, especially in this economy.
Is it Safe to Eat Young Sourdough Discard
Using very young starter/discard can be controversial so I will first tell you to do your own research and make your own judgement call. This is one of those hot topics in the sourdough community and you'll hear a lot of fear mongering surrounding it - especially in Facebook groups (*cringe*). I stay away from those groups as I find them to be very toxic and just full of know-it-alls who make bold claims without backing them up. It's just a lot of noise and uneducated opinions.
my hot take
Here is my somewhat hot take on this topic after making many starters, doing LOTS of research, and having a lot of real life experience. As long as you have stored it in the refrigerator, you are not eating the starter raw, and you are cooking it thoroughly, it is perfectly safe to use in discard recipes within the first week or two. For example if you make sourdough discard cookies, don't eat the raw dough if you're using a really young starter to make it. But once baked, any potentially harmful bacteria from the flour will die at normal baking temperatures. Of course you won't want to use your new discard in anything long-fermented or in any overnight room-temp recipes until it is truly established, bubbly, and active.
I guess the bottom line is, it really is an individual judgement call. I've used discard in the first week many, many times and feel perfectly fine baking with it. But, if you are worried about it (which is totally valid by the way!) just don't use the discard until your starter is established. It's similar to how people are divided over eating raw flour, raw eggs, raw cookie dough, or even sushi - some people will tell you it's unsafe and others are totally fine with it.
USDA guidelines on sourdough discard (spoiler alert: there aren't any)
Another final thing to keep in mind: Currently (July 7, 2026) the USDA has no safety guidelines on sourdough starters. In my opinion, if it was as unsafe as some people claim, the USDA would have it posted in their food safety guidelines and/or warnings.
Browse any of my discard recipes here:
- Sourdough Pumpkin Bread (discard or active starter)
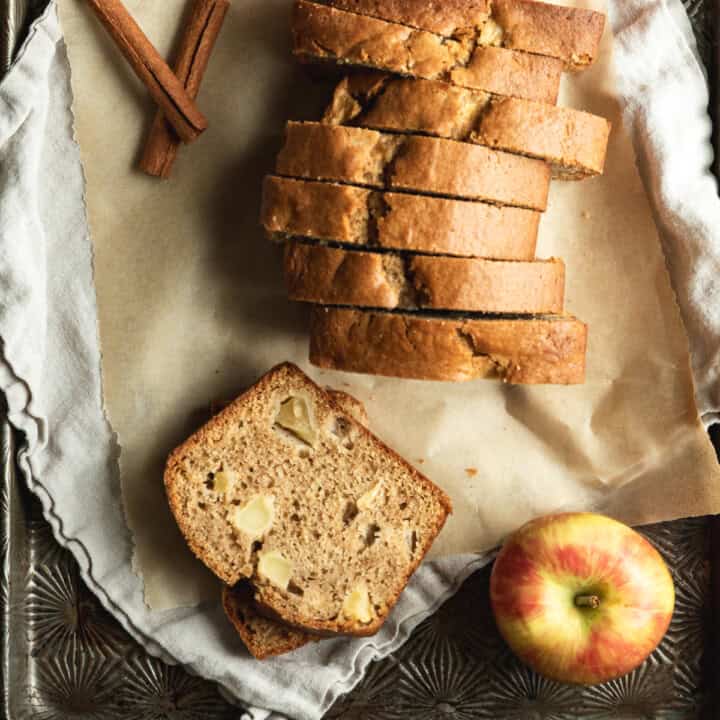
- Sourdough Discard Apple Bread
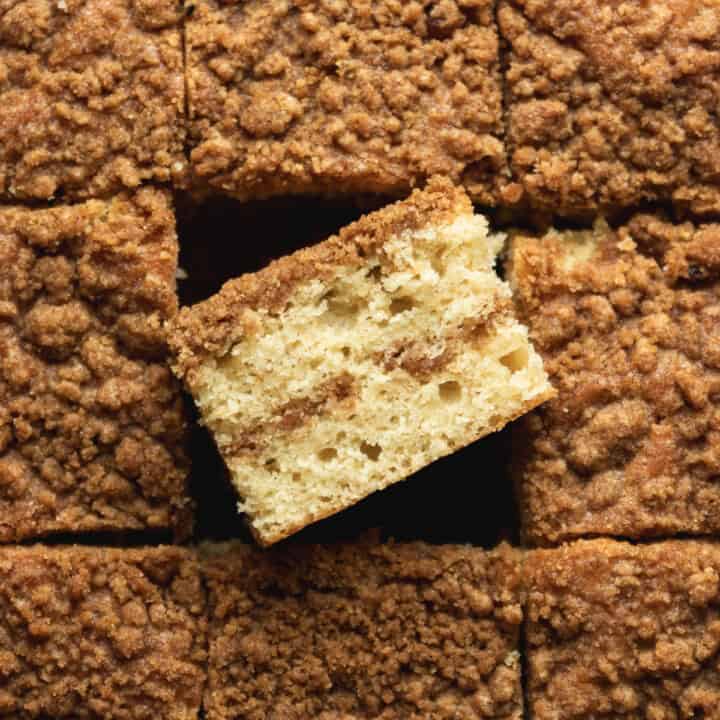
- Sourdough Discard Coffee Cake
- Sourdough Peach Cobbler


When is My Sourdough Starter Ready to Use?
Usually around the 7 day mark, your starter will smell pleasantly sour and will be just about doubling in size after a feeding. Although, it may not always double even when it is active. To be sure it is active and ready, look for these signs:
- Doubling after feeding.
- A slightly domed top as it is rising that will flatten out at peak.
- A pleasant aroma as we discussed above.
- Lots of bubbles and webbing when you stir it at peak.
You can perform a float test, but this is not always reliable. Simply place a small spoonful of starter into a dish of water. If it floats it is active, but if it does not float, it could be active but past peak. An isolated float test is not a great measure on it's own.
Sometimes it takes closer to 2 weeks though, so be patient and don't rush the process. If you are really itching to bake with your starter, try a recipe written specifically for discard. I have several in my sourdough recipes category. Each time you discard a portion of starter, stash it in a jar in the refrigerator until you have accumulated enough for a recipe. It won't be very sour at the beginning, but you can still use it in discard recipes. Sourdough discard baking is a great way to get a sourdough fix while you wait!
Top Tips
- Pick a convenient time for your sourdough starter feedings. The same time each day while you are establishing a starter is important. So if you want to care for it while you have your morning coffee, after you drop your kids at school, during your toddler's nap, before you go to bed... It doesn't matter as long as it works for you and you can stick to it every day.
- Once your starter is established, head over to my How to Feed and Maintain a Sourdough Starter post for long-term care instructions and lots of sourdough starter faqs.

Easy Beginner Sourdough Starter Recipe
Flour, water, and time are all you need to make a beautiful, bubbly sourdough starter that you can use to make delicious baked goods for years!
- Total Time: 7-14 days
- Yield: one sourdough starter
Ingredients
ingredients:
1 5lb bag of organic, unbleached all-purpose flour
water
equipment:
glass jar with lid - (the jar should be able to hold about 2 cups, 16-ounces, 470 ml)
additional glass jar for discard if keeping
wooden spoon
silicone or rubber spatula
rubber band or wet-erase marker
Instructions
- Day 1: Place ½ cup (60 grams) of flour and ¼ cup (60 grams) of water in a glass jar and mix very well. Cover and let sit in a warm room temperature spot for 24 hours. In the oven with the light on is my go-to spot when I want a warm environment for my starter or for rising doughs. On top of the refrigerator is a great spot too.
- Day 2: Remove half of starter mixture from jar and replenish the starter with ½ cup (60 grams) of flour and ¼ cup (60 grams) of water. Stir well, scrape down sides, cover and leave in a warm room temperature spot for 24 hours.
- Day 3-7: Repeat the same process as Day 2 each day.
- Day 7-14: Continue with the same process and monitor for doubling in size after 4-12 hours (a rubber band or marker can be very useful for this and fun if you have kids helping) and for a pleasantly tangy, sour smell.
- Once your starter doubles in size after feeding, has a pleasantly sour aroma, lots of bubbles and webbing when you stir it at peak, you can begin to experiment with sourdough baking! For long term feeding and maintenance head over to my How to Feed and Maintain a Sourdough Starter post and when you are ready to start baking, give my Artisan Sourdough Bread for Beginners recipe a try.
Notes
If you want to speed things up, you can replace about ½ of the flour amount with whole wheat flour for the first couple of feedings. The fermentation will happen a bit faster but you should still plan on waiting until day 7-14 to see results just in case.
- Prep Time: 7-14 days
- Cook Time: n/a
- Category: sourdough
- Method: sourdough
- Cuisine: American
Aaron says
Can I feed it after 12 hours or wait 24?
anita | wild thistle kitchen says
Hi Aaron. If 12 works better for you then you can do that!
Aaron says
Thank you . Can I ask when I do make my bread what is your recipe ?
anita | wild thistle kitchen says
Hi Aaron! No problem at all. I have several sourdough bread recipes so feel free to browse around the site, but here is a link to my Beginner Friendly Artisan Sourdough Bread Recipe. Let me know if you give it a try!
Leia Wang says
Hey so I am just getting started with my starter and am wondering how to keep it active after it is ready. Do I just feed it every week or so by discarding half and keep it on the counter? If so, how do I feed it? Thank you!
Amy says
I really appreciate your simple, straightforward direction. Very easy to follow and makes me feel more comfortable with learning.
Gail Watts says
I followed your guide and have bubbly, yeasty smelling starter. It doubles in about 5-6 hours. I tried the water float test and my starter floated. However, when I made my dough, there was absolutely no rise at all.
Any suggestions?
Thank you!
anita | wild thistle kitchen says
Hi Gail! How old is your starter? Sometimes it will double and even pass the float test in the early days of development, but it still needs the full 9-14 days to become strong enough to bake with. And also please let me know what bread recipe you tried. I'd love to help you troubleshoot!
Debra Ann says
Can ancient flour be used for this recipe instead, like Einkorn, Emmer, or spelt?
anita | wild thistle kitchen says
Hi Debra. Yes, absolutely. Keep in mind that those flours, especially if they are whole grain or freshly milled, will ferment much more quickly. Let me know if you have any other questions. - Anita
Addison says
Hello! I am on day 11 and my starter has some bubbles but is not doubling in size at all. I am discarding half daily and replenishing with 60g water and 60g flour. What should I do?
anita | wild thistle kitchen says
Hi Addison! Try discarding most of it and leave only about a tablespoon or two in the jar. Feed that about the same ratio (60g water 60g flour) so you have a rather thick mixture with no dry clumps of flour. Cover and let sit for 6-12 hours and check for doubling. Let me know how it goes!
Mary Marra says
Hi. I’m worried because I just started and my starter is super dry. Should I add more water?
anita | wild thistle kitchen says
Hi Mary. Yes, you can add more water. In the post I explain that it is good to use the consistency as a guide - I like for mine to be about the texture of thick pancake batter and I rarely measure anymore. I just shake in some flour and add water until it is the texture I like. If it looks too thin, I add a bit more flour. If it looks too thick and pasty, I add a splash more water. All flours are different - some are more dry than others - so the exact amount of water you'll need to moisten the mixture can vary a tiny bit. Let me know if you have any more questions! - Anita
Sharon Cauble Holliday says
Hi Anita. I’m really trying to do this right I’m on day 7 and not much seems to be happening. I’m going to keep on working on it. Thanks so much for the recipe and you being willing to share with us.
anita | wild thistle kitchen says
Hi Sharon! Don't give up! You've got this! Keep me posted on your progress and let me know if you have any trouble or if I can answer any questions! Thank you for your kind comment! - Anita
Kim says
I think it maybe just too cold in my house to create a good starter. I am on day 18...and it's just not growing. I'm making fantastic glue! After week one, I did move it to the microwave, keeping the door open and light on. It stays at 70ish degrees consistently. I was feeding it 1x per day. I've taken your advice to discard more, feed it 2x per day. Not much movement. It doesn't double. Should I continue, or start over???
anita | wild thistle kitchen says
Hi Kim. 70 degrees is perfect for building a starter. Do not start over. Can I ask what kind of flour and water you're using? Are you covering it loosely? Are you checking it for doubling after 12 hours? It may be doubling fast since it is already 18 days old. Also, does it smell sour at all? Let me know - I'm happy to help troubleshoot!
Kim says
Sure! I am using a fresh bag of Bob's Red Mill Unbleached Enriched Artisan Bread Flour. Using tap water. Well water. I don't screw the lid down tight, but possibly not loose enough?
It's not doubling. At least not the last few days. Earlier there were a few days when it looked hopeful, but not today! I appreciate your feedback. Thank you!
Hillarie says
Help! I am on my 2nd attempt at a starter and I am well past 7-9 days. I have been feeding 44 oz of water, 44 oz of unbleached all purpose flour. I had been doing every 12 hours but wasn't discarding enough so now I'm back to 24 hours. Some days it grows, some days it doesn't. I have no idea what I will find each day. Should I scratch it and start over using the 1/2 cup flour & 1/4 cup water? Appreciate any advice.
Hillarie
anita | wild thistle kitchen says
Hi Hillarie! No do not start all over! At this point you definitely have some good wild yeasts and lactic acid bacteria built up. Try this: discard a LOT of it. Like bring it down to just a couple tablespoons. And then give that a good feeding of about 1/2 cup flour and 1/4 cup water to make it a rather thick paste. Leave this covered at 70ish degrees room temp and check it after 12 hours for doubling. Let me know how it goes! - Anita
Linda says
Excellent instructions. Day 3 and things are lookibg good!
Ellie Davidson says
Hi im worried mine is not growing right, i looked at the comments and it said they feed every 12 hours, i do 24. Mine if small and not a lot of growth has happened, any tips? Thanks a bunch!!
anita | wild thistle kitchen says
Hi Ellie. How many days have you been building your starter? If you're still in the first week, keep doing every 24 hours. After that you can switch to 12 hours if you'd like. Let me know how it goes!
Jane Smith says
Anita, Thank you so much for this post and your amazing instructions!
Jane S
Torrie says
Everything has been really helpful but I do have a few questions. I’ve been doing the feeds every 24 hours, day 3 it had tripled in size. I know around that time it can do that and nothing again until day 7 or so. About the 12 hour mark of day 3 into day 4 it had already doubled in size. When I went to feed it at the 24 hour mark it had liquid at the bottom. Was that okay to mix in and keep feeding? Also do I need to feed it every 12 hours if it’s this active? Thank you in advance!
anita | wild thistle kitchen says
Hi Torrie! It sounds like your starter is definitely ready and is doubling/peaking around the 12 hour mark which is great! Yes, the liquid (hooch) is totally fine to stir back into the starter - it is just a sign that the starter is hungry. Now that it is active you can go ahead and start baking with it. You do not need to leave it at room temp and feed it every day if you aren't baking with it every day. You can cover it and place it in the fridge. You'll want to pull it out and feed it 12 hours before you want to bake which is easiest to do overnight if you plan to start your recipe the next morning. Let me know if that makes sense and if you have any other questions! - Anita
Torrie says
Thank you so much for getting back to me! I’m going to apologize now I have more questions ♀️
I’ve noticed now every 12 hours there is liquid on top. It hasn’t risen. I took half and feed….so am I not feeding enough or is it just not ready yet?
Lope Ramos says
Very satisfying and very well executed,I can’t wait to see more from you in the near future!
Christine says
I am so glad I found this site, I am a novice in the sourdough starter world. I saved this and will absolutely be referring to all of your very helpful information. I greatly appreciate your comments that it doesn’t have to be so stressful , Thank You!
Jennifer Moore says
This was a great resource. I will be saving it and referencing it I’m sure a few times.
Sarah says
I like my sourdough pretty sour. What would I need to alter to achieve this (if anything)?
anita | wild thistle kitchen says
Hi Sarah! You won't change a thing as far as how you make your starter. To get a really sour flavor you will want to give your bread dough a long fermentation time. After shaping your loaves you can stash them in the refrigerator for a long cold-ferment which will give you that nice tangy sourdough flavor. Let me know if you have any other questions! - Anita
Sarah says
Thanks so much for your reply! How long would the cold-ferment be in the refrigerator?
Sarah says
How long should they stay in the fridge for and do they need to be covered? Also, would you then bring to room temp before baking? Thanks!
PS - I just made sourdough discard pretzels today and they turned out great (but wish they were sour lol).
Lisa says
I have read ur insight and instructions about how to start sourdough starter. my mom, many many years ago worked for the State Of New York as a Nutritional Aide. her primary role was to travel to homes of struggling families and teach them how to feed their families and stretch the meals as far as they could with what they had in the house. she used this starter as one of the best ways to stretch the dollar. the participants would share their discards to other families and it became a very popular among families and friends. i do have some of the recipes they used to use back then, this was in the 70's. sadly I've never done it myself and would love to now and I basically wanted to let u know that u have inspired me due to ur knowledge and experience. I appreciate the time u took to write this all down to help others. now I must ho did out my mom's old recipes to compare, I want to say they they called it friendship bread back then, not positive though until I find it. lol. thank you so much.
Jerry Hash says
I am just starting with making sourdough items. Have been baking for years but never sourdough. I do like sourdough bread but the other items sound very interesting.
.
Ajuni says
Hi there! So this is really weird but my sourdough has been smelling sour from the beginning, in every recipe I've tried too!
Also, the sour dough is thick when I first feed it and then slowly thins out in basically like pancake mix when I feed it again.
Another problem is that I'm on day 5 or 6 now, I think (haven't been keeping good track, oopsies!); and it hasn't shown any bubbles or anything else.
I've been feeding it by discarding half first, using a scale an calculator, and then feeding it 60 grams of water and 60 grams of All purpose flour (un-bleached).
I then store it in my oven for the night until about 7-9 pm the very next day to do to the cycle again.
What am I doing wrong?? Is it supposed to be like this?
anita | wild thistle kitchen says
Hi Ajuni. It sounds like it might be getting too warm and over-fermenting in between feedings. Try discarding a little more than half, feed it with fresh flour and water until you have a semi-thick paste, like a very thick batter, and leave it on the counter covered. Check it after 12 hours and see how it's doing.
Laura T Sainz says
So far so good I’ve already tried a few of the discard recipes.
Laura says
I started my starter yesterday. It doubled and is bubbly. I discarded half and replenished. My question is do you leave the discard out on the counter and accumulate discard until you’re ready to bake or does it need to be used or refrigerated? If so by when. Do you store it all together or each days discard separately?
anita | wild thistle kitchen says
Hi Laura. You will want to keep the discard in the fridge. It can all be added to the same jar in the fridge as you discard each day. For the first couple weeks you'll want to use it up within a week. After that when your starter is more established and sour it can last for a few weeks or even longer in the fridge.
Becky says
My starter is awesome, I use the discard for many baked goods, sour dough tortillas are amazing and my family loves the sour dough discard , chocolate cake I make! It is absolutely delicious and moist! I also make sourdough discard crackers, so many things to make with the discard! But sour dough bread is the best!
Andrew Silverman says
I followed your directions I used 1/2 cup flour (unbleached white flour),and 1/4 cup of water (my scale required new batteries) so I had to use the standard cup sizes. The dough was very dry, and in fact not all the flour was hydrated. So
the next morning I had to add additional water.
was the flour that I used not appropriate or was something else that made the dough so stiff, and not hydrated?
anita | wild thistle kitchen says
Hi Andrew. I'm sure the flour you used was fine, but when measuring by volume it is ok to let the consistency guide you. If you see the heading titled Feeding Sourdough Starter Without a Scale I go into more detail on this. But it is always ok to add more water when you mix your starter if it seems very thick and especially if some of the flour is not hydrated. And if it seems too thin, simply add a touch more flour. I look for a thick pancake batter consistency. But you do not need to start over, just keep moving forward, remove half and replenish, and make sure all the flour is hydrated before you cover and leave it to ferment. Let me know if this helps and if you have any other questions. Thanks! - Anita
Rohan says
Hey Anita, thanks for the amazing recipe! I just had one question. It’s day 8 of my starter. It was bubbling well until day 7, but it still hasn’t doubled or risen. I’m in a colder climate (the Northeast), so I’m wondering if that might be affecting it (my temp is set at 71ish but my house is a bit drafty). Should I keep feeding it every 24 hours with the same measurements, or should I switch to twice-a-day feedings to help it get ready?
anita | wild thistle kitchen says
71ish is perfect! Yes, switching to every 12 hours will give it a boost if it seems sluggish! It may just be so active at this point that it is rising and falling before you are checking on it. So give it a discard and feeding and then check it after 12 hours. It can also help to discard more than usual before feeding, so feel free to give that a try as well. I'm excited for you! You're so close! Let me know if you have any other questions. - Anita
Sherrill Salom says
Hi Anita,
First-time sourdough maker here. Actually I haven't even made it yet. I'm still building my starter and so far it seems to be going well. It doubled in size yesterday after feeding but it still does not have enough of that distinctive sourdough smell, so I'm letting it go 3-4 more days at least before trying your basic sourdough recipe. I'm currently using King Arthur basic white flour but will be switching over to the much-less-expensive Costco Organic Unbleached White flour. I'm currently on day 6 of the starter and have been keeping it in a glass jar by my stove.
Question...I've been "informed" by a family member that I should never ever use metal utensils when making my new starter or when working with sourdough bread dough. In other words, don't stir the wet starter with metal utensils and don't make the bread dough in metal bowls. I was told it can "ruin" the leaven. I doubt this, but I don't want to ruin all my hard word so decided to ask the professional here...being you! Thank you for all this info, by the way. It's really helpful, and I am going to try your "discard" recipes because I also abhor waste. Thanks!
anita | wild thistle kitchen says
Hi Sherrill! I'm so glad your starter is coming along - it sounds like you are doing everything right! It is perfectly fine to use a non-reactive metal such as stainless steel to stir your starter. I know plenty of people who prefer to use a fork to stir their starter. Also, Danish dough whisks have wooden handles and metal whisks and they are used widely in the sourdough world. And for another example, I use the stainless steel bowl of my Kitchenaid stand mixer extensively to make all kinds of beautiful sourdough as well as bake it in metal pans. You would want to avoid any reactive metals such as uncoated aluminum, copper, or non-stainless steel. Let me know if this helps! I'm always here if you have more questions. Thanks so much! - Anita
Kenny VanHouten says
Hello! Your guidance says to remove half, then add 60g and 60g. Are we supposed to be keeping a 1:1:1 ratio with feeding? Or are we supposed to be only removing half the starter and then only adding the 60g and 60g?
I started out by removing half the starter, so after day 2 I removed 90g then added the 60g and 60g. Then on day 3, I removed half of that (105 g) and then added the 60g and 60g. But I think I’ve read part of your website every day for the last week, and it had me thinking maybe I was supposed to be keeping the 1:1:1 ratio, so I have since been doing 60g of starter, 60g water and 60g flour at each feeding.
We’ve tried a few of your discard recipes though and they are all excellent! Thanks for sharing all your knowledge.
anita | wild thistle kitchen says
Hi Kenny! I'm so happy you've been enjoying the discard recipes! Yes, during the "building" phase each day you'll remove half either by eyeballing it like I very often do, or by weighing it to be precise. You do not have to strictly stick to the 1:1:1 for establishing the starter - those ratios become more important when you begin your true sourdough baking. But yes, if it makes you more comfortable, then sticking to that ratio is perfect for establishing the starter. Let me know if you have any more questions and thank you so much for your kind words. 🙂 - Anita
Laura T Sainz says
Thank you!
Debbie says
Just wanted to thank you. Your recipe and instructions were perfect and I finally have successfully created starter! Today is the day I begin my baking journey.
Tina Holzschuh says
After the starter is ready, and you put in the fridge, what feeding ratio is common to use to keep it fed? Once a week feeding until I am ready to bake?
Do I need to set the starter out to get to room temp and then feed once a week?
Do I still discard?
Do you have instructions on what to do when it's time to bake? Sorry, for all the questions, but there seems to be 8000 ways to make sourdough bread. lol
Thank you
Tina Holzschuh
anita | wild thistle kitchen says
Hi Tina! Once a week feeding is recommended, but you can definitely stretch that once your starter is very lively. I've left mine in the fridge for weeks (and even months) before without touching it. But yes, while it is young once a week is probably wise, and you can do the same 1:1:1 ratio you've been using to build the starter. Let it double at room temp and place it back in the fridge. It does not need to come to room temp before discarding and feeding.
When you are ready to bake you'll want to begin with a starter that has been recently fed and is at its peak (in other words it has doubled since you fed it). You'll use however much the recipe calls for and then feed what remains in your jar, let that double at room temp, and place it back in the refrigerator until you are ready to either feed it or bake with it again.
Most recipes will call for a 1:1:1 ratio but occasionally you might find one that calls for something different. If you want a good starter loaf, give either my Sourdough Sandwich Bread or Artisan Sourdough Loaf for Beginners a try. And if you are keeping your discard, I have loads of sourdough discard recipes you can try! Just let me know if you have any questions along the way. Good luck and just keep swimming! I know it can seem overwhelming in the beginning but you will get more comfortable as you go along and I'm always here to help! - Anita
Dawn says
HI
My starter started off beautiful. Day 3 and 4 it had not only doubled but tripled in size. Day 5 I got up and it had all dropped. For whatever reason I decided to try the oven light trick, this made it very runny, stopped doing that. I haven't given up but any thoughts as to what is happening? Today is day 8 and barely any bubbles.
anita | wild thistle kitchen says
Hi Dawn. Don't give up! If you look at the step-by-step photos you'll see that this is totally normal. It's common to have a burst of growth in the first couple of days. This is just the bacteria from the flour creating what it is called a false rise which is just an overgrowth or temporary bloom of bacteria. This does not mean your starter is ready. And then it is also very normal to have a few days of little to no activity after that bloom. Since you are now on day 10-11 your starter is pretty advanced and might be doubling and falling before you are checking it. Try discarding a larger amount than usual and giving it a good feeding of flour and water so you have a thick paste. Put it in a warm but not too hot spot like on top of the refrigerator. Check it for doubling after 10-12 hours. Let me know how it goes! - Anita
Carly says
I am on day 9 of normal feedings, but not seeing any doubling, but some bubbling and scent. It did double in the beginning.. I transferred it to a clean jar this morning after feeding. It is in a warm spot, covered, and I’m using king Arthur’s flour. Should I discard most and start with a fresh feeding?
anita | wild thistle kitchen says
Hi Carly! Yes, discard most and give it a fresh feeding. And check it after 12 hours as it may be doubling faster now that it is more established. Let me know how that works for you! - Anita
Carly says
Thanks so much! I had already fed it as normal yesterday before seeing your response, so I did the discard and fresh feed this morning. If it doubles today or tomorrow, is it ready to be used?
anita | wild thistle kitchen says
Hi Carly! Yes, if it doubles at this stage (9-10 days old) it is ready! Good luck and let me know how it goes!
Carol Parks says
I'm confused about whether or not to include the total jar weight to determine what is my discard amount. Do When weighing the jar containing my developing starter, do I deduct the weight of the jar and discard half of the remaining weight to determine what my discard will be or just use the jar's actual weight and discard half of that reading?
anita | wild thistle kitchen says
Hi Carol. Let's say your jar weighs 400 grams and your starter weighs 180 grams leaving you with a total of 580 grams on your scale. You want to remove half of your starter (90 grams). So you subtract 90 from the total (580) which will leave 490 grams on your scale once you remove half of the starter. This number (490) is the weight of your jar plus the weight of half of your starter. Now you can add back in your 60 grams of water and 60 grams of flour. If you always know the weight of your jar you can easily determine the weight of your starter and how much to remove. But you can also just eyeball and remove half - it does not have to be precise. Let me know if this makes sense. - Anita
jas says
This recipe is so simple to follow and it resulted in a beautiful starter for me. Discarding and feeding once a day worked perfectly for me. Thank you for posting this!
Cecilia says
I’ve tried reading most posts to see if this has been asked. So once the starter is established, you’re ready to bake with it, discard an amount, the feed it with same amount that was discarded, and once bubbly then use the starter for the recipe (and use the discard with any discard recipe if so desire). Is this correct?
anita | wild thistle kitchen says
Hi Cecilia. Once your starter is doubled somewhere around the 9-14 day mark, you can bake with it immediately. Or you can pop it in the refrigerator until ready to bake. At the time you are ready to use it, about 12 or so hours before you want to mix your dough, you'll remove the starter from the fridge, and you'll do the same 1:1:1 ratio you've been doing. So one part starter, one part flour, one part water (unless your recipe calls for a different ratio). The starter you do not use in this fresh mixture will be your "discard" and you can put it back in the fridge, toss it in the trash, or make a discard recipe with it. Let the freshly fed starter sit at warm room temperature and double and then you are ready to mix your dough. I usually let this happen overnight so I can mix my dough the following morning. Let me know if that answers your questions. - Anita
Brisilda says
Hello Anita, I appreciate your instructions on making sourdough. I'm on my eleventh day of the sourdough starter, and it has more than doubled. I don't know if it's ready to be used or not.
Thnak you:)
anita | wild thistle kitchen says
Hi Brisilda! Yes, if it is more than doubling after 11 days and it smells nice and sour, you are ready to get baking. 🙂 Let me know if you have any other questions! - Anita
Tom W says
I'm new to starters and have this question. From one type of flour to another is there a large difference in weight of the flour? I ask this because your recipe calls for a half cup of flour (60g) and a quarter cup of water (60g). I was measuring, not weighing, because I didn't have a scale. I was having problems with the starter using those measurements. I needed to add 3 tablespoons extra water to get a stir-able mix. In the meantime I have purchased a scale. It turns out a half cup of the flour I'm using does not weigh 60g. It weighs 81g. Hence my question above about weight difference from one type flour to another. I am doing some experimental rescue attempts on my starter and have started a new starter using weight, not measurements. Thanks for posting your recipe. I'm looking forward to making some hard crust dinner rolls like I used to buy at the grocery but which don't seem to be available to buy any more.
anita | wild thistle kitchen says
Hi Tom. I'm thrilled that you are embarking on your sourdough journey! Thanks for trusting my recipe. 🙂 Yes, different flours can have different weights, but also, measuring by volume (with measuring cups) is very inaccurate for a lot of reasons. The freshness and moisture levels of flour as well as the brand and variety of flour will impact the weight. Also, all measuring cups are not created equally and vary greatly from one brand to another. Another factor is that when you scoop the measuring cup into the flour you are compacting it, so some suggest the spoon and level method, which can be a bit more accurate, but even that is still highly variable. I generally go by the King Arthur Baking website's conversion chart for volume-to-weight conversions, and they along with a majority of bakers and baking websites claim that a cup of flour weighs 120 grams, but I have found in my kitchen that a cup of flour is usually more like 140 gram when I scoop it from the flour container. This is the stuff that will drive you crazy! You'll get a feel for your starter and eventually for the doughs you create with it. If they are too wet, add a bit more flour. If they are too dry, add a splash of water. As long as you are creating a thick pancake batter consistency, your starter will turn out great. Just stick with it and do the discards and feedings every day. And let me know if you have any questions in the meantime! - Anita
Dee says
Hi Anita, I forgot to mention in my last question that my starter is also not doubling anymore. It was at first. It's not bubbling either and looks like paste, almost like Elmers glue. It smells good though. We're at about day 14 or so now.
McKall says
Hi Anita, I am just starting my sourdough and your website has been amazing and so informative! So thank you! Just a couple questions. I am on day 9 and my start and just started to double and smells great. but I have missed a couple days of feeding it. Do I need to start over?
Also can I save my discard? Or do I need to use it right away or can I save it?
anita | wild thistle kitchen says
Hi there! Thank you so much for your kind words. No, if it is doubling and smelling great, you definitely do not need to start over! You can start using it in sourdough recipes now! If you aren't planning to use it every day, be sure to store it in the refrigerator. You'll want to pull it out the night before you plan to bake and give it the same feeding ratio you've been using - it should be doubled and ready to bake with by the next morning.
Yes, you can save your discard in the refrigerator. I always have a jar of discard on hand for recipe testing. 🙂
Please let me know if you have any other questions and thanks again! - Anita
Dee says
Quick question. When do I put the starter in the fridge? I'm around day 12 of feeding it and keeping it on the fridge. And how often do I feed it once it's established? Is it always the same ratios as when establishing the starter?
anita | wild thistle kitchen says
Hi Dee. You can keep it in the fridge once it's established and you're getting consistent growth after feedings. How often you bake with it and feed it will be up to you. An established starter can last weeks (if not months) in the fridge without being fed. But assuming you're baking with it weekly, you'll take it out of the fridge the night before you want to bake, discard and feed with the same 1:1:1 ratio unless the recipe specifies otherwise, and the next morning it will be ready to bake with. If it has been in the fridge for an extended period of time, you may want to plan on giving it two feedings before baking with it just to make sure it's strong enough. In general, most sourdough recipes use the 1:1:1 ratio, but occasionally you may come across one that calls for something different. Let me know if this helps and if you have any more questions! - Anita
Mary A Franks says
Hi I am on day 11 and no riseing yet there is small bubbles i am doing warm water in the feedings. What should I do next to get it to rise?
thank u I hope u can help.
anita | wild thistle kitchen says
Hi Mary. I recommend using room temperature water, not warm water, in my instructions. Warm water could be causing your starter to over-ferment in between feedings, which will result in an acidic, sluggish starter. I recommend discarding a large portion of your starter - like get rid of almost all of it except for a couple tablespoons. To that little bit of starter, add 1/2 cup of flour and 1/4 cup of water. Stir it well and at this point it might be a good idea to transfer to a new, clean jar. Cover the jar and place it in a warm spot in your kitchen such as above the refrigerator or in the oven with the light on. Check it after 12 hours. Let me know how that works!
Jean Jacobi Heidcamp says
Hi, Anita!
I’ve never made sourdough bread, nor even a starter, but I’m going to try! I’ve bought all the supplies (I think) that I’ll need. My question is a very basic one. When I combine the first 1/2 cup flour with the 1/4 cup water, do I mix it up in a bowl or in my new Weck jar? There’re in the dishwasher right now, waiting to be run tomorrow after breakfast. I’m guessing it probably doesn’t make much difference, as long as I put it in the jar right after combining. I’m just thinking I’d have a better sense of mixing thoroughly if it’s done in the bowl. I could see dry spots of flour easier in the bowl. But, then I remembered that I’m supposed to scrape down the sides as soon as I’ve mixed it up. Help! I’m not even to point I could say I’m a newbie, and I’m really almost afraid to start! My husband thinks I’m overthinking, and he’s probably right. Thanks for your help.
anita | wild thistle kitchen says
Hi Jean! I think we all overthink it when we first start with sourdough - I know I did! But you're right, it doesn't make a difference. If you feel more comfortable mixing it in a bowl and then transferring to your jar, go ahead and do that! But if you want to save a dirty dish, just mix it right up in the Weck jar. Since it's glass you'll be able to see if it's mixed thoroughly. Either way is totally fine. I'm so excited for you to get started!! Please reach out to me here if you have ANY questions. I'm always so happy to help and I know I had a million questions when I first started. Thanks so much for trusting me as you begin your sourdough journey! - Anita
Deedee Fronius says
I live in Las Vegas so my house is kept pretty cool (68-78 degrees year round depending on how many people are at home). Do I don’t really have a good space to keep it a constant temperature during the feeding process aside from my microwave. Obviously we use the microwave (not all the time, but it is used). Would that be a good alternative to sitting on top of the stove? Will moving it to use the microwave when needed disturb the growth process? I don’t want to go through all of this and have it not work because I can’t keep a stable temperature. Thanks for your help.
anita | wild thistle kitchen says
Hi DeeDee. Those temperatures are just fine for growing your starter on the countertop. You could even stick it in an upper cabinet. My house is usually 68-75 depending on the time of year and I always just leave mine on the counter after feeding. No need to worry! Let me know if you have any other questions. Thanks! - Anita
Nicole says
I’ve always read or watched videos saying you can’t use the discard until the sourdough is established. Isn’t it at first filled with bad bacteria?
anita | wild thistle kitchen says
Hi Nicole! While you will not be able to use it in true sourdough recipes, and you would never want to eat it raw, you can absolutely store the discard in the fridge during those first couple weeks and use it in any baked/cooked application as long as it looks and smells fine - meaning no mold or off colors, which should not be an issue if you are using clean jars and utensils when mixing it. In my line of work I've created many starters for teaching purposes and I always incorporate the discard into my baked goods because I hate waste. It won't have a very sour smell or taste yet, but it will work in any discard recipe. Let me know if you have any other questions. Thanks! - Anita
Samantha says
My starter tripled in size day 1. It also had the sour smell associated with sourdough. Is this normal?
anita | wild thistle kitchen says
Hi Samantha. Sometimes you'll see a large amount of growth early on, which is called a "false rise" and is just an overgrowth of bacteria and will typically be followed by a few days of no activity at all. This is totally normal and if you look at my step by step photos you'll see that this happened to me as well around the 3-4 day mark. You still need to keep building up your starter's strength for a week or two before using it in sourdough recipes. Let me know if you have any other questions and good luck! - Anita
Ali Fisher says
After the 9 days of discarding half and feeding, how do I care for it on a day-to-day basis??
anita | wild thistle kitchen says
Hi Ali. I've answered this a few times in the comments but here is a summary: Once your starter is established you can bake with it when it has doubled and before it begins to fall (this is when a recipe calls for active starter or peaked starter). Once you use what you need, give what is left in the jar a feeding, let it double, and then place it covered in the refrigerator if you don't plan to bake with it again right away - at this point you can leave it in the fridge for weeks if you need to.
As far as how to care for it, this will depend on how often you are baking. For example, if you want to bake only once a week, you'll want to pull your starter out the night before you plan to mix up your dough, feed it with the same 1:1:1 ratio unless your recipe calls for something different. Then the next morning it should be doubled and ready to work with. If you are baking on a daily basis, you can just leave it at room temperature and feed it after each use so it's ready for the next day.
Let me know if this helps and if you have any other questions. Also, feel free to read through the comments as there is a lot of great Q&A here already. I'm always here to help! Thanks! - Anita
Kim Oborne says
Hi Anita, Can I ask what the sourdough started does in recipes, like the cinnamon rolls?
anita | wild thistle kitchen says
Hi Kim. I created the Sourdough Discard Cinnamon Roll Recipe simply as a no-waste solution and a way to use up excess sourdough discard. If your starter is established it can also add a slight tanginess to the rolls, especially if you let them cold-proof overnight. In my Sourdough Cinnamon Roll Recipe, the active sourdough starter is used to leaven the rolls or to help them rise as instant yeast or active dry yeast would.
Whenever you see a recipe that has "discard" in the title it is usually a quicker recipe that uses another leavening agent like conventional yeast or baking powder in combination with the unfed or discarded sourdough starter. These recipes are often created to offer a quick, no-waste solution so we don't have to actually discard any starter. And if the recipe calls for active starter, it means the starter will be used to leaven the baked good in place of any conventional leaveners.
I hope that answers your question. Let me know if I can help in any other way! - Anita
Naya says
Hi! I am on day 10 of feeding my starter but not seeing any movement. The first 2 days, the starter doubled in size, on day 3, the action stopped and it's been stagnant since then. I have been discarding and feeding every day at the same time and keeping it in the oven under the oven light for the last 2 nights. The last few days it has been moist, with a gross smell (not sour), and today the smell has decreased some but the starter looks dry. Any recommendations on what to do from here? I have not yet gotten the bubbling or sour smell.
Thank you!
anita | wild thistle kitchen says
Hi Naya. I'm sorry you're having these issues. The starter should definitely not be dry. Are you covering it? Also, have you been discarding half and feeding it fresh, non-chlorinated water and all purpose flour every 24 hours?
Here are my thoughts: As long as you see absolutely NO signs of mold or discoloration, go ahead and discard almost all of it, place only about a tablespoon in a clean jar. Feed it 1/2 cup flour, and about 1/4 cup fresh, cool or room temperature water and mix well so you have a thick pancake batter consistency. Cover it and leave it at room temp, not in the oven, for 12 hours before checking the growth. I'm thinking maybe your oven light is too hot and it is causing the starter to over-ferment and become too acidic over the full 24 hours. Give this a try for a few days and let me know how it goes. I hope this helps! Let me know if you have other questions in the meantime. - Anita
Zoe says
Hi Anita,
I wanted to ask if the starter has a very strong smell, because this is the second time I’ve attempted making it and they’ve both had a very unpleasant smell, I couldn’t even describe what it smells similar to. My mum gagged the first time she smelled it, she did say she reckons that’s what it is meant to smell like but considering she’s never made a sourdough starter I figured I’d ask.
Also what’s the consistency meant to be like? When I first started it was like cake batter but as I’ve continued it’s been more liquid like than I feel it should be.
anita | wild thistle kitchen says
Hi Zoe. Yes, once the starter is established it will have a fairly strong, slightly yeasty/acidic smell. You'll be able to smell the fermentation which I suppose can be off-putting to some people. To me it is a pleasant, sour smell like yogurt or even beer at times. It should not smell incredibly funky like cheese, if that makes sense.
The consistency should be like a thick pancake or cake batter, not thick like a dough and not incredibly runny like buttermilk. Feel free to add a touch more flour to thicken it up at any point.
Let me know if this helps and if you have any other questions. Thanks! - Anita
Kim says
Day 3 and my starter grew!! I’m so excited. Should I continue to feed with a 1/2 whole wheat, 1/2 unbleached flour mixture for the remainder of the feeds? Thanks!
anita | wild thistle kitchen says
Hi Kim! That is great news! Yes, if that is what you've been using, feel free to keep using it for the remainder of the building phase. After that, you can switch it up if you want - see the Can I Switch Flours heading in the blog post for more info on that. Starters are very resilient and adaptable once established. I'm so excited for you! Thanks for this great feedback! - Anita
Kay says
Hi, my house is kept below 65 most days and there is a cabinet on top of our fridge. Im worried the oven light is to warm and do not like keeping it on to long, any suggestions?
anita | wild thistle kitchen says
Hi Kay. 65 degrees will work just fine it will just be slower. To speed it up you can look for a heating mat that has a very low setting such as one designed for seedlings. Or place it near anything warm in your home such as a heat register, coffee pot, computer, or on top of any appliance that is running constantly such as a fridge or freezer. If you run your dryer a lot you could also place it on top or close to the dryer. You could also place a mug of warm water next to your starter in an insulated cooler or in your microwave to create a warmer environment. These are just a few ideas, but just know that your starter will still grow and your dough will rise even at that lower 65 degree temp, it will just take a bit more time. Please let me know if this helps and if you have any other questions. - Anita
Jane says
Do you have advice to help boost a sluggish starter? Currently just using all purpose flour. She grows and has made lovely bread but never doubles
anita | wild thistle kitchen says
Hi Jane. If she is growing and making good bread I wouldn't worry too much about the doubling in size. But a few ways to boost a sluggish starter is to discard almost all, give a good feeding of flour and non-chlorinated water, and make sure to place the starter in a warm spot. Sometimes a starter can become too acidic, so discarding a large portion will restore the balance. You can use the discarded starter in any of my Sourdough Discard Recipes so you won't be wasting anything! Just keep in mind, you only need a very small amount of active starter to inoculate a fresh jar - like a tablespoon. So don't be afraid to really deplete yours. You can also try using a stronger bread flour and/or adding a bit of rye flour to really get things moving. Let me know if that helps and if you have any other questions. Thanks! - Anita
Kirsten Altpeter says
Hello, what consistency should this be right after the first mix? Mine immediately turned into a dough ball (I measured in grams)
And I didn’t think it was right so I added a bit more water and now it’s like a thick pancake mix. It’s only been 12 hours so may be too early to tell if it’s working but I’m anxious about waiting three days for something that won’t turn into a starter lol
anita | wild thistle kitchen says
Hi Kirsten! Yes, it should be like a thick pancake batter consistency which is what I get when I measure in grams according to this recipe but I suppose the brand of flour you use as well as the humidity in your climate could have an impact. You won't see any action after just 12 hours so don't worry! Just make sure you're discarding and replenishing every 24 hours according to the recipe, not just leaving it for three days. Take a look at my photos in the blog post to see how mine was looking throughout the process. Let me know if you have any other questions. Thanks - Anita
Jane says
When you start are you supposed to cover airtight or cover with a cloth?
anita | wild thistle kitchen says
Hi Jane. You can cover with a cloth or a lid - it doesn't really matter too much unless your kitchen is very dry and then the starter may dry out if you are using just a cloth. I don't use anything airtight, but I do keep it well-covered. As you can see in the photos I use a glass Weck jar lid but I don't use the rubber gasket or metal clasps to make it airtight. Just beware, fruit flies absolutely love sourdough starter, so whatever you choose to use, be sure they can't get in. If I use a cloth, I always seal it with a rubber band so they can't sneak in. Also, if it's going in the fridge, you will want to cover it with an airtight lid. Let me know if you have any other questions. - Anita
Jane says
Thank you! Now I am on day 4, yesterday it looks bubbly and grew but when I took out the discard it looked like it separated and was water on the bottom. This morning it didn’t grow and is super watery. Does that sound right?
anita | wild thistle kitchen says
Hi Jane! Yes, that is totally normal for the beginning. If you take a look above in the blog post at my process photos you'll see that I had some days with no growth as well as some liquidy days. It's all part of the process! You're doing great and I'm very excited for you! Keep me updated and let me know if you have any other questions. - Anita
Jane says
So I am now on day 14 and she hasn’t doubled. She is bubbly and smells find. Do I continue or should I start fresh?
anita | wild thistle kitchen says
Hi Jane! No definitely don't start over if your starter is smelling good and looking bubbly. Try discarding more than half, maybe like 3/4, and give it the same size feeding you have been. Also, try checking the growth a little sooner as maybe it's doubling and already sinking by the time you're measuring - especially if your kitchen is very warm. Let me know how that works! - Anita
Jane says
I think that worked! Now I don’t want to use it until next weekend. Should I feed(not take out half) and put it in the fridge?
anita | wild thistle kitchen says
Hi Jane! I'm so glad that worked. If you aren't planning to use it until next weekend you'll need to put it in the fridge and then you'll want to pull it out the night before baking, give it the same treatment you just did (remove 1/2 to 3/4 and feed it) and then it will be ready for you the following morning. Let me know if you have any other questions! Thanks - Anita
Natalie F. says
This was my first time working with sourdough, and boy was I scared starting out. It sounded like such a finicky commitment, so I never did it. This recipe yielded a starter that gave us bakery quality sourdough bread in 7 days! Way sooner than I expected. Seriously can’t recommend this enough, it’s been so empowering and I’m so super proud of myself for being brave enough to try making this sourdough.
Andrea Natalia Camargo Lopez says
Hi Anita, quick question. Can I use rye flour for my starter? I bought it before I found your blog, and if so, can I use the same measurements you have in your recipe?
Thank you! This is my first time trying sourdough, and I'm very happy I found your blog 🙂
anita | wild thistle kitchen says
Hi Andrea! Thank you! I'm so happy you found me too and I wish you the best of luck as you begin your sourdough journey! I'm always here if you have any questions! Yes, you definitely can use it, but I'd recommend using some white flour as well. Rye flour ferments VERY fast, so it's good to kind of temper it with some regular bread flour or all purpose flour. But rye flour is a great addition to a starter and I often add a bit to mine to give it a jumpstart! Let me know if you have any other questions and thanks again!! - Anita
Andrea Natalia C. Lopez says
Thank you so much, Anita. After buying the equipment, I finally started yesterday. Quick question, is there an "expiration date" for the discard? Or can I keep it in the fridge indefinitely and use it in various recipes? Also, mine had a bubble already this morning. Is it because of the rye flour?
Thanks!
anita | wild thistle kitchen says
When the discard is young (under two weeks old as you establish the starter) you'll want to use it fairly quickly. But once your starter is established and sour the discard will last a very long time in the fridge. As long as it smells pleasantly sour and has no odd colors or mold, it is good to go! Yes some bubbles early on are normal and a great sign - you will definitely see activity faster with the rye flour. I'm excited for you!
Andrea N Camargo Lopez says
Hi Anita! So, it will be nine days tomorrow and my starter has doubled and smells quite nice. Can I start baking now? And if so, should I keep my starter in the fridge, air tight and continue feeding it? I’m confused about the process once the starter is established.
anita | wild thistle kitchen says
Hi Andrea! That is great news! Yes, as soon as it is smelling pleasantly sour and is doubling after feedings, you are ready to bake! You can bake with your starter when it is doubled and before it begins to fall (this is when a recipe calls for active starter or peaked starter). Once you use what you need, give what is left in the jar a feeding, let it double, and then place it covered in the refrigerator - at this point you can leave it in the fridge for weeks. As far as how to care for it, this will depend on how often you are baking. If you want to bake once a week, you'll want to pull your starter out the night before you plan to mix up your dough, feed it with the same 1:1:1 ratio unless your recipe calls for something different. Then the next morning it should be doubled and ready to work with. If you are baking on a daily basis, you can just leave it at room temperature and feed it after each use so it's ready for the next day. Let me know if this helps and if you have any other questions. Thanks! - Anita
Suzi says
I started my starter on Sunday of last week. Every evening, I take out about 3 tablespoons of starter, then replenish with the 60 grams of flour and 60 grams of room temp water. It doubles somewhat by the next day. If my recipe needs 100 grams of starter, do I start adding more flour and water until it doubles? Then remove 100 grams and start back with the 60/60 ratio?
anita | wild thistle kitchen says
Hi Suzi. I'm so glad it's working for you! Yes, you can do that if it works and makes sense for you. But if you are using the 1:1:1 ratio you'll have roughly 180 grams of starter (60 grams multiplied by 3). So you can remove 100 grams for your recipe and just feed whatever you have left with equal parts flour and water. Even if you just have a tiny bit of starter left you can still feed it that ratio and it will become active and bubbly. Let me know if that makes sense and if you have any other questions. Thanks! - Anita
Connie says
Can you turn you discard into more starter?
anita | wild thistle kitchen says
Hi Connie. Yes, you can. In the first two weeks your discard will not be very active so it is best to either discard it or use it in a recipe written specifically for discard. But you'll also want to keep in mind that if you never discard anything, and you keep saving it all and feeding it ALL, you'll end up with an astronomical amount of starter unless you are baking a ton of sourdough bread to use it all up (for example if you were running a bakery or baking for a large church, school, or other organization on a very regular basis). I hope that helps. Let me know if you have any other questions. - Anita
Dee says
Thank you for the prompt answer to my first question! I appreciate that. Just one more question lol. My starter was doubling early on, and smells great but there's no bubbling really and it looks like super paste. It's strange. It's probably about 14 days now? I'm not sure what is up.
anita | wild thistle kitchen says
Hi Dee! Of course - I'm always happy to help and I try to be prompt! It may be doubling and falling now much faster since it is already 2 weeks old. Here's what you should try: Discard more than usual - like 2/3 instead of 1/2 - and give it the same feeding of 1/2 cup flour and 1/4 cup water (approximately) until you have a thicker than usual paste with no dry spots. Cover and leave overnight or for about 12 hours and check for doubling. I'm not worried that there is anything wrong with your starter since it is smelling great, but I think it is either doubling and falling before you are checking, or it has become a little too acidic which is very common and easy to fix! Let me know how this works. Thanks! - Anita
Natalia Graf says
should add a section about temperature - I had no idea the oven with the light on had any purpose and I was just leaving my starter on the counter in the winter!!
anita | wild thistle kitchen says
Hi Natalia. I do say "warm room temperature" which is generally considered to be around 68-72 degrees. But yes, I should be more specific for those who may not know that. For reference, I live in a drafty 1889 farmhouse - the starter you see in these photos was made in March which is still very much wintertime where I live and I left it on the counter the whole time. Also, the first starter I ever made was in January of 2020 and I also left it on the counter with great results. Unless your kitchen maintains a temperature below 65 degrees you will be able to establish a starter. The oven light is a great trick for creating a warm environment both for your starter as well as for rising breads - also on top of a refrigerator works well. If you look up the temperature recommendation for sourdough you'll find a range of anywhere from 68 to 85 degrees - that's a big range! This is another sourdough "rule" that I break often and I actually prefer the results with a cooler fermentation for both my starter and my breads. A lower room temperature will slow the fermentation but it will not stop it completely. Thanks for your comment and suggestion. - Anita
Mackenzie says
I always thought there was yeast in sour dough starter, I'm starting mine today and excited to see how it works out, trusting you!!!!
anita | wild thistle kitchen says
Hi! Nope, no added yeast - just the wild yeasts that will develop as you build your starter over the two weeks. I'm so excited for you! Thanks for trusting my method and please let me know how it goes!
Jen says
Do you stir the starter before removing half?
anita | wild thistle kitchen says
Hi Jen! I do not but you certainly could. Let me know if you have any other questions. 🙂 - Anita
Deb says
I am confused about 1/2 c flour ( 60 grams)& 1/4 c water (60 grams) for beginning the starter. I added 1/2 c water because 1/4 c did not mix all the flour.
anita | wild thistle kitchen says
Hi Deb. Those are the proportions I use and the ones shown in these photos. They will give you a thick, pasty consistency. You don't want this to be extremely thin or watery. I hope that helps. Thanks - Anita
Halle says
To bake with it once it’s active, how do we know how much to take out, how much to replenish, etc.?
anita | wild thistle kitchen says
Hi Halle. This will depend on the recipe(s) you are planning to make. For example, if the recipe calls for 150 grams of starter, you'll need to combine 50 grams each of starter, flour, and water to create 150 grams of active, bubbly starter to bake with. Some recipes don't specify, but for the most part a 1:1:1 ratio is used in most sourdough recipes unless it specifically states otherwise. I almost always do a bit extra or even double so I have some lively starter to stick in the fridge for next time. For example instead of 50 of each I'd do 80 or even 100 grams of each, use the 150 grams to bake my bread and then stick the rest in the fridge. 🙂 Let me know if this helps and if you have any other questions. - Anita
karen barnes says
Love your site. You need to make a more extensive informative post about sourdough. There's so many questions and it's such a science that it's super confusing. I am reading through all the comments and it's just making me more and more hungry for information on the signs of sourdough because I feel like I'm doing it wrong. My question at the moment is what is the 1:1:1 ratio? I understand the flour to water ratio what's the third ingredient?
anita | wild thistle kitchen says
Hi Karen. I'm so happy you love my site - that really means a lot 🙂 Yes, I'd love to add more posts that covered all the ins and outs of sourdough in more detail. Since this post focuses specifically on How to Make a Sourdough Starter I tried my best to stick within that scope and add enough extra info to be informative but not overwhelm beginners with information overload. To cover everything I'd need to write a book! Which would be a dream - maybe one day. I have been working on a How to Maintain a Sourdough Starter post which I hope to have published soon that addresses a lot of the questions I've gotten in the comments.
A 1:1:1 sourdough starter ratio is one part starter, one part fresh flour, one part fresh water - equal parts by weight. So when you being discarding and replenishing your starter, you are creating this ratio. There are many different ratios and you don't have to get too hung up on being exact. You'll get a feel for the thickness and you'll just know if it is too thin, add more flour, too thick, add a touch more water.
Also, once your starter is established, you only need a tiny bit to get a fresh batch going (you may have read this in the comments already) and in fact, if your starter is being sluggish, smelling highly acidic, and your loaves are coming out gummy or flatter than you're used to, it is a good idea to discard almost all of it (don't waste it - use that discard in a recipe!) and give it a good feeding of fresh flour and water to restore the balance and get it really strong and lively again.
Yes, there is a LOT to learn with sourdough and believe me, I'm still learning. So thank you for your comment and suggestion and I will do my best to add more info as I'm able. In the meantime I'm always here to answer questions and help in any way I can! Thanks again - Anita
Joanne says
Hello-how do you set up starter knowing I won’t make bread every day.?
Do I make the starter recipe and then after day 14 put it in frig til I know when I will bake?
Also do you stir it before you discard or just discard, then add ingredients then stir?
anita | wild thistle kitchen says
Hi Joanne. You will make the starter the same regardless of how you plan to use it. Yes, once it is active and bubbly you'll store it in the refrigerator and the night before you want to bake, take it out, discard what you need, and feed it with a 1:1:1 ratio or whatever the recipe you plan to make calls for. The next morning it should be doubled in size and ready for sourdough baking. If it has been in the refrigerator longer than a week you may want to give it two feedings to really bring it back to life before baking. I don't stir it before discarding, but you certainly could. Let me know if you have any other questions! Thanks - Anita
Nadia says
I’m really confused on what to do once the starter is ready. For example, if I feed the starter on Day 21 and it’s active, do I put it in the fridge right away or let it sit for 24 hours?
Once I’m ready to bake a loaf, am I supposed to discard? Should I be discarding every time I bake?
anita | wild thistle kitchen says
Hi Nadia. I'm not sure what you mean by 21 days. After the 2 weeks (14 days) of building up your starter, you can bake with it right away when it is doubled, bubbly, and active or you can store it in the refrigerator. If you are baking once a week, you will want to pull your starter out the night before you want to bake, discard if necessary, and feed according to how much starter you'll need for the recipe you'll be making. The next morning it should be doubled in size and ready to bake with. If you leave it in the fridge for an extended period of time, you may need to give it a couple of discards and feedings before it is lively enough to bake with.
The reason you discard is so you aren't feeding a huge amount of flour and water to your starter. If you keep 60 grams of starter then you'll want to feed it 60 grams water and 60 grams flour. But if you have a very large amount of starter in your jar, you'll likely want to discard some before feeding so you end up with a more reasonable amount of bubbly starter once it has doubled. I can't predict the recipes you will make or how much starter you will need when you do so you will have to figure that out as you get into your sourdough baking routine. Just know that whenever you end up with extra starter, you can always make a recipe that calls for sourdough discard so you won't be wasting anything.
I hope this helps. Please let me know if you have any other questions. - Anita
Mary says
I am heading out to get the supplies to start this journey. Not going to lie, I’m really nervous. Breads intimidate me. But I have wanted to try for a long time and I love the idea of making my own and knowing what I’m feeding my family. I have one question, I know you said any flour could work really, but would the White Lilly flour be okay? Or should I just go buy the unleashed flour you use? I also have a bread flour here I bought as well. Thank you for this information!! Here’s to hoping it all goes well!!
anita | wild thistle kitchen says
Hi Mary. I'm excited for you to start your sourdough journey! Yes, as long as it is not the self-rising variety, White Lily can be used to make your starter. Because of its low protein content, I would not recommend it for bread baking. You can use it for softer sourdough products though like biscuits, scones, muffins, pancakes, etc. Let me know if you have any other questions. I'm always here to help! - Anita
Jennifer Garman says
Eek!!! I am on day 6 and I just realized that I have been removing 60g of my starter, then feeding 60g flour and 60g water. I feel like it isn’t quite half. I “think” I should still be okay, but I will be more diligent about how much I am removing.
What do you think? Have I been not taking enough out?
anita | wild thistle kitchen says
Hi Jennifer! Yes it will be totally fine! It's close enough and in a few more days you'll see some good activity. Good luck and let me know if you have any other questions!
Abbey says
Love your recipes! I began a sourdough starter 9 days ago following your tips, and it looks like I’m ready to bake! Question: do you have a recipe for a classic sourdough loaf? I didn’t see one. Or do you have one that you would recommend?
anita | wild thistle kitchen says
Hi Abbey! Thank you! I'm so happy to read this! Good luck on your sourdough journey - it is so fun! I do not have a basic sourdough loaf, believe it or not! It has been on my list forever. You can't go wrong with a Farmhouse on Boone recipe though. She is the queen of sourdough in my opinion. I'll let you know when I finally get one posted!
Deborah Ross says
What is the rubber band for or wet erase marker for?
anita | wild thistle kitchen says
Hi Deborah! I explain in the blog post that you can use the rubber band and/or the marker to monitor the growth of the starter. If you wrap the band around the jar at the level of the starter (or mark it with a marker) just after feeding, it will help you see how much it has grown once it becomes bubbly and active.
Laurel says
This was a really helpful article, but how is the starter maintained? How often do I need to feed it if it’s at room temperature? If it’s refrigerated, can I feed it less?
anita | wild thistle kitchen says
Hi Laurel! If you look under the "What to do with sourdough starter when you need a break" heading I give short term and long term refrigerator and other storage options. Unless you are baking with it every day, I do not recommend storing it at room temperature as you will have to continue the same 24-hour discard and feeding schedule and you will just end up with a LOT of discard. The way you store it it will really depend on how often you bake with it. If you bake everyday, absolutely store it at room temp and feed it after each use. If you bake once a week, I suggest storing it in the refrigerator and the night before you want to use it, pull it out and feed it so it will be ready for the next day's baking. Please let me know if you have other questions!