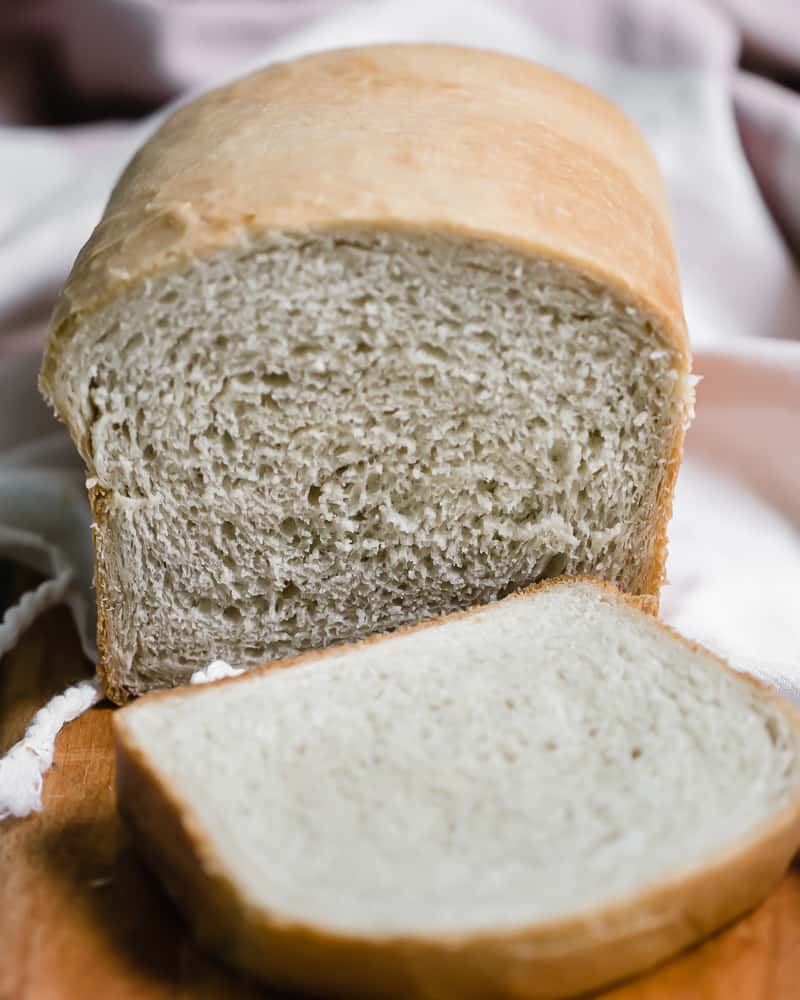
This Soft Honey White Sandwich Bread recipe has a soft, tender crumb and is my go-to loaf for toast, sandwiches, french toast, grilled cheeses. Basically all the good things! Read on for the super simple, always reliable instructions for how to make honey white bread complete with detailed step-by-step photos.
If you love to bake, make sure to check out my Soft French Bread Recipe or my Sourdough Discard Sandwich bread recipe if you are a sourdough baker!
This sandwich bread recipe evolved from a French bread recipe I used to make a lot with my grandma. It was an old magazine clipping that she had stuck to the fridge with a magnet. We'd mix up and proof the dough in her breadmaker and then bake the loaves in the oven for a french loaf shape. I tinkered with the recipe and turned it into a sandwich loaf with a few small adjustments. There is nothing like the smell of this bread coming out of the oven. It makes the best toast. A thick slice, lightly toasted, lots of salted butter. The. Best.
And don't even get me started on a fresh, summertime tomato sandwich on this bread. Lightly toasted, thick-sliced bread, mayo, fresh-from-the-garden tomato, salt: Truly one of life's greatest pleasures.
Instructions (stand mixer or hand kneading)
Stand Mixer Method


First, you will bloom the yeast in warm water and honey - I do this right in the bowl of my stand mixer. (If using instant yeast you can skip the blooming step and just add all of the ingredients). Then, dump all the other ingredients in and let it mix with a dough hook for about 7 minutes. After the dough is kneaded, you have two choices:
You can either cover it and let it rise for 60 - 90 minutes until doubled in size.
Or, you can leave it in the mixer, covered with a damp towel, and every 15 minutes give it a quick 10-15 second mix. You will repeat this process every 15 minutes for 90 minutes - so 6 times total. I learned this rising method from Mel's Kitchen and it has become one of my favorite methods for all kinds of doughs.
Hand Kneading Method
You can do this recipe by hand too, and it's very therapeutic. Just follow the same instructions for blooming yeast and adding ingredients, stir it all together with a wooden spoon or dough whisk. Once you have a shaggy dough, dump onto a lightly floured surface and knead for about 10 minutes until you have a nice, smooth, moist but not sticky dough. You'll then place it in a large, greased bowl and let rise in a warm place for 60-90 minutes.
Kneading Dough Tips
- If your dough feels tight while kneading, let it rest for several minutes before continuing to knead.
- Check to see if the dough is fully kneaded by performing the 'windowpane' test: take a golf ball-sized portion of the dough and gently stretch it apart. If the dough is properly kneaded, it will be elastic and form a thin membrane that you can see light through. If it is not fully kneaded or over-kneaded, the dough will break apart.
- One of the benefits of kneading by hand is that you're less likely to over-knead your dough.
Here is a great video from Nielsen-Massey on the various hand-kneading techniques: How to Knead Dough by Hand
Shaping & Baking Your Honey White Bread Loaves


Once dough has doubled in size, dump it out onto a lightly floured surface and divide evenly in half. Press each half into a rough oval/rectangular shape that is a little shorter than the loaf pan. Fold one short end into the center and press down gently. Next, fold in the edges and press down gently. Repeat the first fold and press gently and then once more to seal. See photos for reference and here is a great video tutorial from King Arthur Flour: How to shape a sandwich loaf. I like to roll the loaf back and forth on my work surface at this point to make it nice and smooth and taut. Then place seam side down in greased loaf pan. Give the loaves a firm press with the palm of your hand to evenly distribute in the loaf pans.
Cover and let rise again for about an hour until bulked but not more than 1 inch above loaf pan.
Then just brush with melted butter, bake, and brush with MORE butter! Yes!


Honey White Sandwich Bread
Soft, fluffy, tender white bread scented with honey and butter. The BEST toast you will ever taste!
- Total Time: 2 ½ - 3 hours total
- Yield: 2 loaves
Ingredients
- 1 ½ tablespoons (about 13 grams) Active Dry Yeast or instant yeast
- 2 cups (480 grams) warm water
- 4 tablespoons (84 grams) honey
- 4 tablespoons (56.5 grams) unsalted butter, at soft room temperature
- 5 ½ - 6 cups (660-720 grams) all purpose flour
- 1 tablespoon (about 8 grams) kosher salt
- 4 tablespoons (56.5 grams) unsalted butter, melted for brushing risen loaves before baking and then again after baking.
Instructions
butter or spray 2 9x5 inch loaf pans and set aside
Stand Mixer Method
- Place warm water, yeast, and honey in the bowl of your stand mixer. Stir to combine and allow to sit for 5 or so minutes until foamy.
- Next, add all the other ingredients in and let it mix with a dough hook for about 7 minutes.
- After the dough is kneaded, you can either let it rise for 60 - 90 minutes until doubled in size ( I do this right in the mixing bowl)
- or you can leave it in the mixer, covered with a damp towel, and every 15 minutes give it a quick 10-15 second mix. You will repeat this process every 15 minutes for 90 minutes - so 6 times total. I learned this rising method from Mel's Kitchen and it has become one of my favorite methods. If I have other things to do though, I just cover the dough and forget about it.
Hand Kneading Method
- In a large bowl, follow the same instructions for blooming yeast and adding ingredients. Use a wooden spoon or dough whisk to combine ingredients.
- When the dough mostly comes together in the bowl, dump onto a lightly floured surface and knead for about 10 minutes until you have a nice, smooth, moist but not sticky dough.
- Place back in bowl that you have lightly oiled and let rise in a warm place for 60-90 minutes.
Shaping your Honey White Bread Loaves (see photos for reference)
- Once dough has doubled in size, dump it out onto a lightly floured surface and divide evenly in half.
- Press each half into a rough rectangular shape that is a little shorter than the loaf pan. Fold one short end into the center and press down gently. Next, fold in the edges and press down gently. Repeat the first fold and press gently and then once more to seal. Here is a great video tutorial from King Arthur Flour: How to shape a sandwich loaf. I like to roll the loaf back and forth on my work surface at this point to make it nice and smooth and taut. Then place seam side down in greased loaf pan.
- Give the loaves a firm press with the palm of your hand to evenly distribute in the loaf pan.
Final rise and bake
- Cover and let rise again for about an hour until bulked in size and nicely domed - be careful not to over-proof here. You don't want the dough to rise more than an inch above the loaf pan.
- During last 30 minutes of rising, preheat oven to 375 degrees F.
- When dough has risen, brush tops and sides gently with melted butter, place in oven and bake for 20 minutes. Cover loosely with foil and bake for an additional 10-15 minutes until golden brown. If you want to get technical, an instant read thermometer should read 190-200 degrees F when the loaves are done.
- Remove from oven and let cool slightly before popping out of loaf pans and placing on cooling racks.
- Brush top and sides once more with melted butter.
Notes
This is written to make two loaves, but feel free to cut the ingredients in half if you only want one loaf.
The loaves will keep covered at room temperature for 3 days. They freeze very well if tightly wrapped.
updated 4/1/25 to include gram measurements.
- Prep Time: 15 minutes plus rising
- Cook Time: 35 minutes
- Category: bread
- Method: baking


Jess says
I make sandwich bread every other day and have tried a number of different recipes- this by far is my favorite!
Amanda says
Can I reduce this recipe to make only one loaf?
anita | wild thistle kitchen says
Hi Amanda. Yes you can 🙂 just divide all of the amounts in half. Let me know if you have any other questions. - Anita
Jenny BEE says
BEST BREAD I HAVE EVER TASTED AND MADE!! I used local, unfiltered honey and organic flour and real butter. So so good. I sliced it up with softened butter and black berry jam. Recipe is so very simple and easy to follow, and I do not have a stand mixer!! Will be making this over and over again!
anita | wild thistle kitchen says
Hi Jenny! I'm so happy you loved this recipe! Thank you for leaving your kind feedback! I bet it was so delicious with butter and blackberry jam! YUM! Thanks again! - Anita
Kylee says
I completely forgot I had something this evening where I’ll be gone 2-3 hours but I already made my dough and it’s proofing, can I let it continue to proof while I’m gone or did I just mess up my bread
anita | wild thistle kitchen says
Hi! You can cover it and pop it in the fridge while you're away! Pull it out and let it finish rising when you get home. Let me know if you have any more questions. Thanks! - Anita
Susana says
Wow!!! Best bread I ever made! Thank you so much for the recipe... Flawless!
anita | wild thistle kitchen says
Hi Susana! Wow! Thank you! I am so happy you enjoyed this recipe! I just updated it to include gram measurements and I'm making a batch today because I want to get a video of the process! This recipe is near and dear to me and I am so happy you enjoyed it. Thanks again! - Anita
Susana says
First time was incredible! Excited to try again with her updated gram measurements!
Hillary Steere says
I'm brand new to making bread. How do I know if I should be using 5.5 or 6 cups of flour? Also, what speed should I kitchenaid mixer be on for the 7 minutes? Thank you!!
anita | wild thistle kitchen says
Hi Hillary! You'll want to start with the lower amount and as you are mixing (start on speed one and then increase to speed 2) during the first few minutes if you see that the dough is very sticky you'll want to add the extra 1/2 cup bit by bit until the dough pulls away from the sides. It is ok if it sticks to the bottom of the bowl a bit but you want it to pull away from the sides by the end of the 7 minutes. Be sure to lower the speed back to 1 as you are adding the flour! Please let me know if you have any other questions! - Anita
Maureen Auerswald says
I would like to bake this, but I now use a scale to weigh ingredients. I am too lazy to convert to grams. I noticed that you do have the grams on other recipes. I'll give it a go and see what happens!
~Maureen
anita | wild thistle kitchen says
Hi Maureen! Yes, I started offering both volume and weight measurements in my more recent recipes especially for sourdough and I have been meaning to update this one although it seems everyone has had great success with the cup measurements. And I have made it countless times without weighing ingredients as well. I hope you enjoy the recipe! Thanks for giving it a try! - Anita
Elizabeth Hutchison says
This recipe never fails. It’s easy to make -and the bread is fluffy and yummy and delicious! Thank you!
Cindy Mc Dermid says
I've made this bread several times and we really enjoy it. Is it possible to use half bread flour and half whole wheat? Thanks!
anita | wild thistle kitchen says
Hi Cindy! I am so happy you've been enjoying this recipe! I think that would work but maybe use a bit less whole wheat and allow for more rising time. Let me know if you try it and how it goes! Thanks for your feedback! - Anita
Adelaide Miller says
This is a great sandwich bread recipe! It's quick and easy, slices super well, and tastes great! It had great flavor, and the melted butter on top was delicious. I will definitely be making this time and time again.
Natalie Morales says
I have 2 8x4 loaf pans. Would this recipe work with those pans? Or they’re too small? Thanks !!! ☺️
anita | wild thistle kitchen says
Hello! Yes you can use them! I have used 8x4 to make this many times 🙂
Kathleen says
Does this make one of 2 loaves
anita | wild thistle kitchen says
Hello. This recipe makes 2 loaves 🙂
Mattie G. says
Perfect sandwich bread on the first try!!
This recipe was so straightforward and clear, and the linked video was PERFECT for helping me shape my loaves. I’ve never made any bread besides focaccia and banana bread, so this was a big step into “real“ breads for me.
I was glad the note about temperature was included, because I checked my bread 5 minutes after covering it with foil and it was done (I think my oven runs hot).
Thank you for sharing this recipe! I look forward to making it many more times in the future!
Sammy says
My best friend and I took the day today to make this and we did the every 15 minute method on rising and this is the best bread I have ever had!! Thank you so much for sharing this recipe! It’s so fluffy and soft and yummy yummy yummy!!
Are we able to freeze the dough? So if we were to make extra dough, could we freeze it? If so how would the process of rising work after thawing it out?
Thank you so much!!
anita | wild thistle kitchen says
Oh that just makes me SO HAPPY! I actually made a batch over the weekend too. Perfect for a snowy day. 🙂 Yes, you can get to the point of shaping and placing in loaf pan, then cover and freeze. I would place parchment in the pan so that after the dough freezes, you can pop it out of the pan and into a ziploc bag for easier storage and so your loaf pans aren't trapped in the freezer - haha. Then when you want to bake, thaw in loaf pans in the fridge overnight, move to room temp and continue with the 2nd rise and bake. Let me know if that makes sense and if you have any questions. I will have to add this to the recipe notes as well! Thank you!! xoxoxo - Anita
Bkessed Mama of Mbay says
This bread is delicious, thank you!
anita | wild thistle kitchen says
I am so glad you love it as much as I do. Thank you!!
Cassy A. says
Made this during the winter storm in Texas, in between rolling blackouts. So delicious and easy to follow! We devoured it with some homemade jelly!
anita | wild thistle kitchen says
Cassy! Thank you! I am so sorry for what you all are going through! Very happy and totally honored that you made my recipe and that it was a success. You are in my thoughts! xo - Anita
Erica Butler says
I have made this bread too many times to count and it's about time I leave a review. Your details and instructions make seemingly challenging techniques so easy! This bread is the perfect every day bread, it's great as toast, and holds up very well! Usually we eat the entire thing before it has time to go stale anyway - ha! This is my go-to recipe for a homemade loaf and I can't thank you enough for your detailed instructions that make me feel like I really know what I'm doing in the kitchen!
anita | wild thistle kitchen says
It makes me so happy that this has become your go-to! I'm so proud of this recipe and the step-by-steps. I just feel like any type of dough recipe when kneading and shaping is involved really benefits from very detailed, visual instructions. Makes me so happy to hear that they are as helpful to you as they are to me! Thank you!!! xoxo - Anita
Cristina says
LOVE this recipe! The easiest recipe to follow with step by step instructions and the best tasting bread! This is a must try.
anita | wild thistle kitchen says
Cristina! Thank you so much for the kind comment and review! I am so happy you've had success with this recipe! xo - Anita
Sue N. says
This is my very first bread, not from a bread machine, and it was easy to follow, and came out delicious! I also made the honey butter. Thank you so much for sharing this wonderful recipe. I will definitely make it again.
Anita Parris Soule | Cook on a Whim says
Sue! This comment made my day! Thank you so much for sharing your experience and I am so happy you enjoyed my recipe! That honey butter is really something, isn't it?? Take care - Anita
Sumit Raje says
Delicious
Tasia ~ two sugar bugs says
I’m loving all the process shots Anita! I haven’t made sandwich bread in far too long and really should give this one a go. You make it look so accessible!
Anita Parris Soule | Cook on a Whim says
Thanks Tasia! I had fun with them! I am such a visual learner, and I feel like process shots are especially helpful with doughs! I'm so glad you enjoyed them. Thank you so much for taking the time to read and comment! Means the world. - Anita
Joan parris says
Another triumph, Anita!! This bread is easy to make, gorgeous and delicious! Joan
Anita Parris Soule | Cook on a Whim says
Thank you!! Oh you made my day with this comment. I miss you! Sending so much love - Anita
Renee says
Love the details of your descriptions beautiful job
Anita Parris Soule | Cook on a Whim says
Hi there! Oh thank you so much! I really appreciate you leaving such a nice comment. I had fun taking all of the process shots and I'm going to try to do it for more of my posts. Take care and thanks again! - Anita