
So your sourdough starter is finally ready, you've baked all the discard recipes, and you're ready to tackle your first beautiful, crusty loaf of real Artisan Sourdough Bread. This beginner friendly recipe is for you! This is my back pocket sourdough recipe - the one I return to most frequently and can practically make in my sleep at this point. I will give you all of the step-by-step details, sample schedules, and process photos as well as both weight and volume measurements so you can make this recipe with the tools you already have. This is a friendly, inclusive recipe - no scary or snooty sourdough rules here! Let's get started!

Recipe Background and Details
Since sharing my How to Make a Sourdough Starter guide I've wanted to share a simple, accessible Artisan Sourdough Bread recipe. I really took my time with this one as it is such a special milestone and I think it's the ultimate goal for many of us when we being our sourdough journeys. I remember exactly how I felt the first time I made an artisan loaf - uncertain, nervous, excited, in over my head. The recipe I followed back then included advanced sourdough terms and techniques and while it turned out beautifully in the end, it was all just a bit much for a first-timer and my head was spinning. My hope is that this blog post and recipe will help you successfully conquer those nerves and make your first gorgeous loaf of bread with just the basic sourdough techniques and no panic attacks.

Jump to:
- Recipe Background and Details
- What is Artisan Sourdough Bread?
- Ingredients
- Instructions
- My Thoughts on Bulk Fermentation
- How to Bake Sourdough Bread without a Dutch Oven
- Sample Baking Schedules
- Equipment (and equipment substitutes)
- Storage
- Reheating and Refreshing Sourdough Bread
- Top Tips
- Related - more sourdough recipes
- Artisan Sourdough Bread Recipe
What is Artisan Sourdough Bread?
Artisan simply means made by skilled hands with simple techniques and high-quality ingredients. My Artisan Sourdough Bread recipe is made without fancy equipment or complicated techniques. You just need a bowl and your hands - and an oven of course.
I have to add, I think an artisan loaf can mean whatever you want it to mean as long as it is made from scratch and by hand. I don't worry too much about fancy scoring or even about ears that much. I'm just going for a great oven spring and a flavorful loaf so this is my perfect artisan sourdough bread recipe. Once you get comfortable, I encourage you to play around with the flours, hydration levels, shaping and scoring, oven temperature, etc until you find your perfect loaf.

Ingredients
In true, magical sourdough fashion, you'll only ever need 3 main ingredients to make a stunning and flavorful loaf of bread: flour, water, salt. Of course the starter is a separate ingredient, but it is composed of just flour and water and patience. Pure magic if you ask me.
If you need to make a starter head over to my How to Make a Sourdough Starter post for instructions.
- sourdough starter: Fed within the last 6-12 hours, peaked and very active. I feed mine just before I go to bed and it is ready the next morning. I use a 1:1:1 starter ratio for this loaf - 60 grams starter, 60 grams water, 60 grams flour (½ cup starter, ¼-1/3 cup water, ½ cup flour) will give enough for this artisan bread recipe plus a little extra to feed and stick in the fridge for next time.
- water: filtered and at room temperature
- salt: I prefer Diamond Crystal Kosher salt
- flour: bread flour along with an optional touch of whole wheat
A 1:1:1 starter means you'll combine an equal weight of starter, flour, and water, stir, cover, and let sit until it has peaked which will take anywhere from 6-12 hours depending on the temperature of your kitchen.
See recipe card for quantities.
Instructions
I'll break this up by steps so it is easier to follow.
Mixing the dough

Add water and sourdough starter to a large mixing bowl.

Mix until combined.

Add salt and whole wheat flour.

Add bread flour.

Stir with a dough whisk or wooden spoon until combined.

Scrape down sides, cover, and set a timer for 30 minutes.
How to Perform Stretch and Folds
After 30 minutes you will perform your first set of stretch and folds.

Imagine your dough has 4 corners. Wet your hands and gently grasp one corner of the dough.

Pull dough up until you feel it will not stretch anymore without tearing.

Fold dough back over itself and turn bowl ¼ turn.

Grasp the 2nd corner of dough and stretch up as you did before.

Fold dough back over itself into the bowl. Turn bowl ¼ turn.

Pull the 3rd corner of dough up as you did before.

Fold dough back over itself into the bowl. Turn bowl another ¼ turn.

Pull the 4th and final corner of dough up as you did before. It will not stretch very far at this point but do your best.

Fold dough back over itself into the bowl. You have completed the first set of stretch and folds! Cover bowl and repeat this 3 more times at 30 minute intervals.
Bulk Ferment aka Bulk Rise
After your fourth and final set of stretch and folds, you will cover the dough and leave it at room temperature until it has risen by about 75%. This takes about 5 hours in my kitchen but it will vary quite a lot depending on the activity level of your starter and the temperature of your kitchen.
If you choose the overnight rising option or you need to leave your dough for longer than 5-6 hours, make sure to reduce the amount of starter by half so the dough rises a bit slower. Don't worry if your dough ends up doubling though - you will still have a great loaf of bread. 75% is my preference but I often do overnight and it rises a bit past or even doubles and it turns out great.


How to Shape an Artisan Sourdough Loaf
This is the easiest way I know how to shape a batard or oval shaped loaf which is my favorite shape.
If shaping a boule or round loaf you will just shape it into a tight ball. You can see how to do that in my Chocolate Sourdough Bread recipe or watch this video. I will try to add step-by-step photos at some point.

Place dough onto lightly floured surface and gently stretch into a rectangular shape.

Roll dough into a log.

Dust with flour and flip so that the floured side is down and short end is facing you.

Starting on the short side, roll dough again into a tight log - don't squish it too much but pop any large air bubbles as you roll.

Gently pull dough along work surface to create a bit of surface tension.

Pinch ends to seal and pop any large air bubbles.

Flour a lined banneton as well as the top of the dough and lift dough from surface.

Flip dough so the floured side is down and place into prepared banneton.

Optional: grab two sides of the dough and pinch or "stitch" it together to create a bit more tension.

Repeat this stitching motion down the center of the loaf.

Dust top of loaf with a small amount of flour. Cover or place in a bag and refrigerate for 12 or up to 24 hours.
I have a 2-gallon ziploc bag that I have reused about a million times at this point. I place the dough in but I don't seal it - I just lightly fold the top over. If I were to go over 12 hours I would seal the bag.
Scoring and Baking
An hour before you're ready to bake, place lidded Dutch oven in your oven and preheat to 475 degrees.

When oven and Dutch oven are preheated, turn cold dough out onto parchment paper.

Rub top of dough very lightly with flour if desired and grab a lame, razor blade, or a very sharp knife

Holding the blade at a slight angle, make a quick slash on the top of the dough from one end to the other.

Remove Dutch oven lid, lift the parchment and lower the loaf into preheated Dutch oven, cover, and bake for 30 minutes.

After 30 minutes, reduce heat to 425, remove lid, and bake for 30 more minutes.

Remove from oven and allow to cool for at least 2 hours before slicing.
My Thoughts on Bulk Fermentation
In many artisan sourdough bread recipes you'll be told to let the dough rise until doubled in size. Well, I have found somewhat by accident that my loaves turn out far better if I only let the dough rise until it is about 75% risen rather than 100% - so just shy of doubling. Once the loaf is shaped and placed in the refrigerator it will continue to ferment and it will also rise ever so slightly. Following this 75% rising technique has given me the best oven spring and the lightest, fluffiest, most even crumb and just my absolute favorite loaves of bread.
Now, don't worry - if you do an overnight rise to fit this into your schedule and it doubles you will still have a gorgeous loaf of bread! I just wanted to give this bit of knowledge and experience but do not want to discourage you at all from using the overnight sample schedule below. You can actually use a bit less starter to help it rise more slowly but I'll explain that in the recipe card notes.

How to Bake Sourdough Bread without a Dutch Oven
Preheat oven with a baking stone, baking steel, or metal cookie sheet or sheet pan on the center rack. Also place a metal pan on the lowest rack.
When preheated, add bread to preheated stone, steel, or cookie sheet and very quickly add about 2 cups of ice cubes* to the other metal baking pan. Close the oven door and bake your bread for 30 minutes. *As an alternative to ice cubes you can add boiling water to the preheated metal pan just be very careful of the steam as steam can really burn! Wear good oven mitts and be careful.
After 30 minutes remove the pan that had the ice cubes if it still has water in it. Finish baking your bread for the remaining 30 minutes.
Sample Baking Schedules
If you are home all day:
- Feed starter the night before just before you go to bed.
- 9:00am: (or whenever you're awake and you and your starter are ready) mix dough
- 9:30am: first set of stretch and folds
- 10:00am: second set of stretch and folds
- 10:30am: third set of stretch and folds
- 11:00am: fourth set of stretch and folds
- 11am through approximately 4:00pm: bulk ferment and rise (or until dough has risen by 75%)
- 4:00: shape dough and place in banneton covered and in fridge overnight
- Next morning: preheat, score, bake
If you work a 9-5 outside the home:
- Feed starter in the morning before you leave for work.
- 6:00pm or when you get home and once starter is peaked: mix dough using half the amount of starter the recipe calls for - this helps slow the rise a bit since you'll be doing a longer overnight rise.
- 6:30pm first set of stretch and folds
- 7:00pm second set of stretch and folds
- 7:30pm third set of stretch and folds
- 8:00pm fourth set of stretch and folds
- 8:00pm through early next morning: overnight bulk ferment
- 7:00am or 8:00am (next morning before leaving for work): shape dough, place in banneton, cover, and place in fridge.
- 7:00pm-8:00pm that evening: preheat oven and bake
These times are just a suggestion - if you push the start time an hour or two you can shorten the bulk fermentation time a bit and try to get closer to that 75% mark. Just play around with it and do what works best for you, your schedule, and your kitchen conditions.
Equipment (and equipment substitutes)
I don't always include an equipment section in my recipes but since sourdough does call for some specialty items, I thought I'd share some thoughts.
Making the Dough and Shaping
Scale: you absolutely do not need a scale to make great sourdough bread but it can make it more accurate and convenient. Here's the Oxo scale I use.
Danish dough whisk: I bought this two pack from amazon years ago. You can also just use a wooden spoon.
Flexible dough scraper: This is a very inexpensive tool that I use every time I make dough. It often comes in a sourdough starter kit, but here is a good stand-alone dough scraper option on amazon.
Spray bottle: I like to use this spray bottle to wet my hands before handling dough and also to spray the sides of the bowl before scraping to get any dry bits of flour.
Proofing and Scoring
Banneton baskets: I tend to use a batard shape most often. You will have to decide which shape you prefer. This sourdough starter kit has one of each. You can also use a well-floured kitchen towel inside a bowl or small basket.
Baker's lame or razor blade: The starter kit above has a lame but I prefer my Wire Monkey UFO Lame (I got one in my stocking this year and I love it!). If you use my affiliate link you can get 10% off. You can also use a regular razor blade or a very sharp, serrated bread knife to make a quick slash.
Parchment paper or silicone dough sling: I use parchment and often reuse it unless it gets really toasted and brittle. I've heard mixed reviews on the silicone bread slings so just do your research before buying - if I ever try one I'll report back. If you don't have any of these items you can carefully turn your loaf out into your dutch oven, quickly score it, and bake it.
Baking and Slicing
A lidded Dutch oven: Or similar heavy pot. I use my very old Lodge uncoated cast-iron dutch oven or an enameled dutch oven. You do not have to use a Dutch oven if it's an investment you are not ready to make. See "How to Bake Sourdough Bread without a Dutch Oven" heading for more info.
Bread knife: This one really is essential if you are planning to make crusty sourdough bread. You don't need to spend a lot to get a good bread knife. This is an affordable and highly rated bread knife option on amazon.
This post contains affiliate links. As an Amazon Associate I earn from qualifying purchases. Please feel free to check out my full disclosure policy.

Storage
An unsliced, uncovered artisan sourdough loaf will keep at room temperature for 24 hours. After that you should cover it to prevent drying. Once covered, it will quickly lose its crispy crust.
I store my bread either in a large lidded cake stand for quick, everyday use or in a ziploc bag or large tupperware. If I have an abundance of sourdough such as after recipe testing, I slice it, place it in a ziploc bag, and freeze it. It can go straight from freezer to toaster.
There are lovely beeswax bread bags and other items made specifically for sourdough but I have not tried any of them.
Reheating and Refreshing Sourdough Bread
If your loaf is whole or mostly whole, you can spritz it with water or quickly run it under the faucet before placing in a hot oven for about 10 minutes.
Already sliced bread, you can heat in a hot oven until warmed through, in the toaster, or in a warm skillet.
Top Tips
Practice, practice, practice. If you want to be a sourdough master, you can and you will be if you practice, learn to trust your instincts and read the dough, and find what works best for you. Watch videos on shaping and scoring if those are things you really care about. Just know that your skills and your instincts will develop with practice.
Unless something really goes wrong, you will end up with a delicious, edible loaf. If it is flatter than you wanted or a little gummy inside it will still make great toast or croutons or even bread crumbs.
Related - more sourdough recipes
Looking for other recipes like this? Try these:
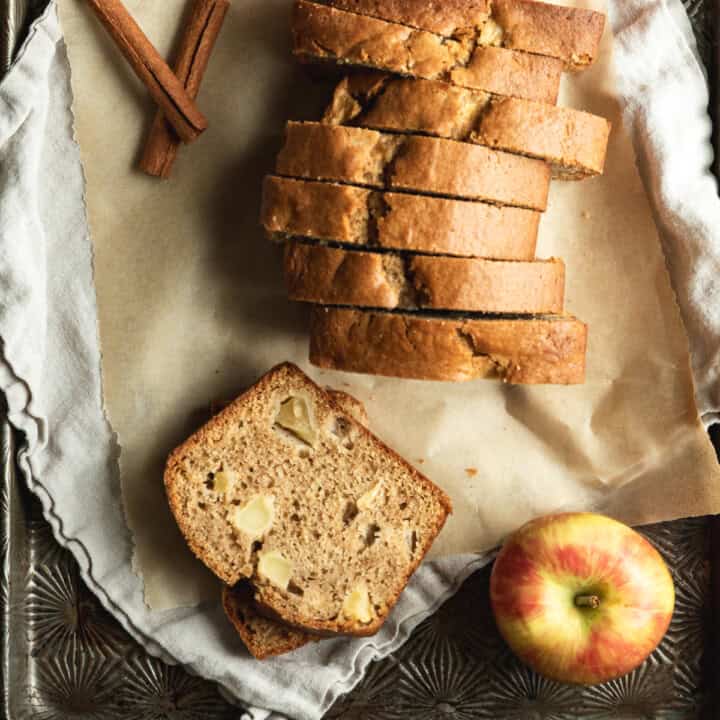
- Sourdough Discard Apple Bread
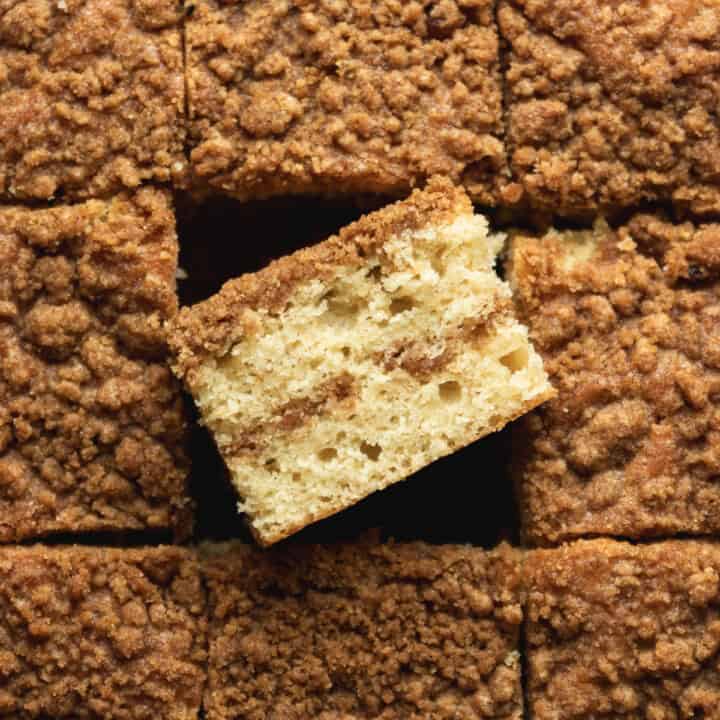
- Sourdough Discard Coffee Cake
- Sourdough Peach Cobbler
- Triple Lemon Sourdough Scones


Artisan Sourdough Bread Recipe
So your sourdough starter is finally ready, you've baked all the discard recipes, and you're ready to tackle your first beautiful, crusty loaf of real Artisan Sourdough Bread. This beginner friendly recipe is for you! I provide both weight and volume measurements so you can make this recipe with the tools you already have. This is a friendly, inclusive recipe - no scary or snooty sourdough rules here! Make sure to read the blog post for step-by-step details, sample schedules, and process photos.
- Total Time: 2 days
- Yield: 1 loaf of sourdough bread
Ingredients
I provide both Gram and Volume measurements because I like to make sourdough an inclusive and friendly journey. These are not down-to-the-decimal-point exact conversions, but I found in my testing that these both gave satisfactory and equivalent results.
If this is your first time making an artisan loaf, read the entire recipe, go back up and read the blog post thoroughly and look at the pictures throughout the process. Make sure you have the time and the tools, including an active starter, before you begin.
GRAM measurements:
360 grams water
113 grams peaked sourdough starter
10 grams kosher salt
30 grams whole wheat flour
450 grams white bread flour
CUP measurements:
1 and ½ cups water (you may need up to an extra ¼ cup)
½ cup peaked sourdough starter
1 and ½ teaspoons kosher salt
¼ cup whole wheat flour
3 and ¾ cups white bread flour
Instructions
- Mix water and sourdough starter in a large mixing bowl until combined. Add flours and salt and mix again with a wooden spoon or Danish dough whisk until all flour is combined. Scrape down sides, cover, and let rest for 30 minutes.
- After 30 minutes perform first set of stretch and folds (see detailed instructions with photos in blog post). Cover and repeat 3 more times at 30 minute intervals for 4 total sets of stretch and folds.
- After your fourth and final set of stretch and folds, you will cover the dough and leave it at room temperature until it has risen by about 75%. This takes about 5 hours in my kitchen but it will vary quite a lot depending on the activity level of your starter and the temperature of your kitchen.
- When dough has finished rising, turn out onto floured surface and shape to desired shape. For a batard, gently stretch into a rectangular shape. Beginning on the short end closest to you, roll the dough up into a log popping any very large bubbles as you roll. Dust the top with flour and flip over so that the floured side is down and the short end is facing you. Roll up again into a tight loaf shape. Pinch the ends to pop any large bubbles and seal the edges and pull dough across your work surface to create some tension in the dough. *For a boule or round loaf, shape dough into a ball as instructed in this video.
- After shaping, dust top of loaf with flour.
- Lift your loaf and flip it, placing the floured side down into a floured banneton. Stitch dough if desired to create a bit more tension.
- Cover and place in refrigerator for 12 hours or up to 24 if covered well to prevent drying out.
- When ready to bake, do not remove dough from refrigerator until oven is preheated. Preheat oven to 475 F with Dutch oven inside for 1 hour. When oven is ready, remove dough from refrigerator and turn out onto a piece of parchment paper. Score your loaf. For a simple score, make one quick cut along the top of the dough - do not go down the sides. Feel free to experiment with other scores but this is the simplest and quickest and in my experience helps with the best oven spring. If you plan to do an elaborate/decorative scoring pattern, freeze dough for about 30 minutes beforehand.
- Carefully transfer dough by lifting it in its parchment paper and lowering into preheated Dutch oven. Cover with lid and bake at 475 for 30 minutes.
- After 30 minutes remove lid, lower oven to 425, and bake for another 30 minutes. Tent loosely with foil if you don't want your loaf to get dark.
- When time is up, remove from oven and allow to cool for at least 2 hours before slicing.
Notes
I used King Arthur Organic for both the whole wheat and bread flour when testing this recipe.
You can omit the whole wheat flour and use all bread flour.
If you choose the overnight rising option or you need to leave your dough for longer than 5-6 hours, make sure to reduce the amount of starter by half so the dough rises a bit slower. Don't worry if your dough ends up doubling though - you will still have a great loaf of bread. 75% is my preference but I often do overnight and it rises a bit past or even doubles and it turns out great.
Because it is easy to over-measure flour when measuring by volume, I found that I needed a touch more water when measuring this way. You'll know when you're mixing if you need a bit more.
- Prep Time: about 24 hours
- Cook Time: 1 hour
- Category: sourdough, breads
- Method: baking, sourdough
- Cuisine: American
Kathleen Childress says
this is my second season attempting sourdough bread, and this summer could be the summer of success!
my actual question though is how do you store the bread ? I feel like a plastic bag would decrease my crust . what are your thoughts?
Tony says
Hi when you make your first loaf and take 60gms out of the starter do you still replace and feed every time it's used?
Emma Davis says
Hi Anita! I have been following your sourdough starter guide, made several of the discard recipes (all delicious, by the way!), and I have finally made my first (two) loaves of the artisan loaf! While it did make a wonderful loaf, I can’t seem to find a solution to one of my issues when it comes to the baking process and I wanted to get your thoughts. When I bake my loaf, I follow your directions to the letter. I preheat my oven with my dutch oven inside for an hour, after my timer goes off I get my dough out of the fridge, flip it out onto parchment, score it, and move the parchment (with the scored dough) into the dutch oven and bake for covered for 30min at 475, then uncovered for 30min at 425, and I remove it and allow it to cool on wire racks for two hours before slicing. My issue is when it comes to slicing, my knife cannot cut through the bottom because it is rock hard! I have a brand new electric knife so I don’t think that is where my issue is. Any suggestions or advice you might have would be great!!! Thank you!
anita | wild thistle kitchen says
Hi Emma! This is a very common issue in sourdough baking. To avoid that you can do a few things: once you remove the lid for the second stage of baking, place a small wire rack or trivet under the loaf (I do this often and need to add these instructions to the post), you can also remove the loaf completely from the dutch oven and place it on a parchment lined baking tray to finish the baking process. Another option is to place a baking tray on the rack beneath the rack you're baking on - this will act as a heat shield protecting the bottom of your Dutch oven. Even with all of these options though, you'll still have a hard bottom crust as that is just the nature of a crusty artisan loaf, but it shouldn't be so rock hard you can't cut it! Let me know if any of these work for you. I'm glad you've been loving the discard recipes!! - Anita
Emma Davis says
Hi Anita! I was waiting until I had good news to report before I responded. I’ve tried moving the dough to a baking sheet when I lower the temp and do the second half of baking, and this has worked out AMAZING for us! I have also been having issues with my dough rising, but I realized I might have been using my starter before it was at its most peaked state. Now my loaves are coming out enormous (in a good way!) and the spring is puffed up a lot more now. I just took out a plain artisan loaf and a jalapeño cheddar version ! Thanks so much for your advice❤️
Erin says
Anita, thank you SO MUCH for this recipe. I tried so many others, and they yielded ho-hum results at best (I'm sure it's user error, but disappointing nevertheless :)). Yours turns out perfectly, every time. Question: Is it possible to turn the one large round into two smaller rounds/boules, and if so, would that affect any of the proofing or baking times? When should I divide into separate pieces? Thanks again for keeping our bellies full and happy!
Crystal W says
I just started my journey using your starter and bread recipe. Amazing and WAY easier than I thought! I tried my best not to over think it and when I wasn't things were just fine.
I did realize after the fact that I did not turn my oven down during the baking. I used the "no Dutch oven" method. Was I supposed to turn it down after the first 30 mins?
Thank you for a great beginners guide to sourdough that was NOT intimidating
Ken Price says
Thanks for this recipe. Using it, I made my best loaf yet. If I wanted to make two loaves, do you recommend doubling the recipe or doing two separate batches?
anita | wild thistle kitchen says
Hi Ken! I'm so glad this recipe worked well for you! I have doubled it in a very large bowl and it works out fine, but I started making it in two separate batches and I've grown to prefer that method. I think it's a little easier to manage in two bowls and the bonus is you can add flavorings to one and leave the other plain, but either way works just fine. Let me know what you decide and how it works out! - Anita
Sarah says
So glad to have found your site! I have a wonderful looking starter (finally) and have made the pretzel discard recipe serveral times and they were amazing! I am ready to start the process of an ACTUAL loaf (yippee!). In your recipe for the starter, I had mentioned that I like my sourdough very sour, and you suggested a long cold ferment. In this recipe for the bread, it mentions that if you're going to refrigerate for longer, to reduce the amount of starter by half. Is that still the case for the long cold ferment, or would I need to reduce it by more than half? And does the water and all other measurements stay the same?
Thanks!
Sarah
MarLowe says
I love your easy instructions, Not new to sourdough, but getting back in the game on a work schedule and I love that you provide instructions for this kind of schedule! I have a question regarding your 9-5 baking schedule. When you say "mix dough using half the amount of starter the recipe calls for" would you change the ratio of any of the other ingredients to compensate for this lost volume or am I overthinking it?
anita | wild thistle kitchen says
Hi there! Thank you so much for your kind words! I would not worry about it as it is such a small amount, but I'm a pretty laid back baker! If your dough seems too wet you could add a touch more flour or if it seems too dry add a splash of water. But that tiny amount of starter won't throw things off so I would not worry. Thanks again!! - Anita
Jessica says
I just want to say thank you! With the help of your page and recipe, I made starter and baked my first sourdough loaf today. I’ve combed through recipes and numerous blogs but yours was the most simple to understand and gave me the least stress. I didn’t have high expectations but was super excited and relieved that my first attempt at a pass was a success. Thank you so much for providing such clear instructions with helpful guide.
Jane says
I have made this multiple times and it is great, I have now tried again 3 times and failed. The first 2 were flat and super dense. This third time, it was bulk fermenting for 12 hours and it never is non sticky and will not hold a shape at all. I had to trash the dough. Ideas? I did everything the same as previously and what your recipe says.
Kgs says
Made this artisan sour dough bread twice during the fall season. It was worth all the effort to make something new to enjoy with family. Thank you making this easy step by step. Without you I wouldn’t have bothered to try it.
Daya Bale says
Loved your recipe and so thankful to have found it . It helped me bake my very first loaf just in time for Thanksgiving and it came out gorgeous . Thank you . Feeling blessed . Wish I could share its picture with you .
Happy Thanksgiving
Carrie says
Just finished this loaf after waiting for the Summer’s end, cooler weather as my home gets too warm while baking.
I absolutely love your recipes and am looking forward to trying more of all the delicious home cooked foods that you have graciously shared.
You have a way with the instructions that fit well with my understanding them. I like that and appreciate it greatly.
My starter is about 2 weeks old and I’ve made the discard pumpkin muffins and the traditional white loaf all with success. (I’m not a new baker)
I don’t see how to post a pic but believe me it is beautiful!
Thank you!
Lily says
Hi!
Don’t have enough bread flour, can I complete it with more of the wheat flour?
Thanks
anita | wild thistle kitchen says
Hi Lily. Yes you can use either all purpose flour or more whole wheat flour in place of the bread flour.
TAP1NewEngland says
Anita and Wild Thistle made me a pro with my first loaf, thank you!
Andrea Attias says
Hi I have my starter fermenting on day 6. All good so far. My question is can the bread be baked in a cloche instead of a dutch oven? I'm looking forward to baking bread hopefully next week!
anita | wild thistle kitchen says
Hi Andrea! That is great news! Yes, you can bake this bread in a cloche. Let me know how it turns out! - Anita
Danica says
Hi, I used this recipe, and I am totally new to sourdough making. The dough seems quite soft so I had a bit of challenge last night to shape it and place it in the basket. I’ve tried a different recipe two weeks ago and it was a complete failure. This time following your recipe the process seems much better and the dough look good until I had to do the final role before resting for the night. Do you have any suggestions about the amounts to change and adjust? I would highly appreciate any suggestion.
Thank you, Danica
anita | wild thistle kitchen says
Hi Danica. I'm so glad this one worked better for you. As you continue in your sourdough baking journey, you'll see that sourdough dough is just a very soft dough, but if yours was incredibly soft and difficult to shape, it could have been over-fermented and/or it could have used a bit more flour. If you try it again, just use a touch more flour when you mix the dough and watch the rise so you are not over-fermenting. I like to shape mine before it has doubled because I find it to be easier to work with and the finished loaf just turns out better in my opinion. Also, when you are shaping the dough, use plenty of flour on the work surface to prevent stickiness. I hope this helps and please let me know if you have any other questions. I promise this will all get easier as you continue to practice and bake sourdough loaves! Thank you - Anita
Danica says
Thank you Anita
Joy says
Hi Anita,
Your website and Pinterest page a really informative. I am hoping to bake 1 loaf per week and I want to try several of you "Discard Recipes"
I'm just starting out and have a couple questions, I feel foolish asking, but here they are.
After I have taken out the amount of starter I need for my first loaf -
How do I maintain my starter for the next loaf?
Do I continue the feed & diiscard process daily?
I do want to save my discard to try your other recipes, so I can see doing that for a few weeks, to stock up on discard. But I can also envision eventually having more discard than I can use.
anita | wild thistle kitchen says
Hi Joy! Thank you so much for your kind words. I'm so happy you found me! Please, don't ever feel foolish asking any questions. Sourdough is like a whole new world and I am still learning after all these years! After you take out the starter for your first loaf, you'll feed what remains in the jar, let it double, and then place in the fridge. If you are baking once a week, you can pull your starter out the night before you want to bake, discard and feed, and then by the next morning your starter will be ready to bake with. If you want to build up some discard to keep on hand, just feed it a little extra at a time or leave it out at room temp and discard and feed it for a few days before you retire it to the fridge. Let me know if this all makes sense and please ask me anything! I'm always here to help. 🙂 - Anita
Glenn says
I have made this a couple of times and each time when I get the dough out to shape it, it is so wet that I can’t shape it at all. How do I get the dough more sturdy?
anita | wild thistle kitchen says
Hi Glenn. You can try adding more flour to the recipe. But if the dough is not holding its shape it sounds like you may be letting it bulk ferment for too long. Try shortening the bulk fermentation time and see if that helps. Let me know if you have any other questions. Thanks - Anita
Eugénie Millet-van Rooij says
Hi Anita,
Is it possible to make a new starter from the discards?
anita | wild thistle kitchen says
Hi Eugénie. Yes, it is possible. But you would end up with an enormous amount of starter if you just kept feeding all of your discards. If you were baking on a commercial level or if you were selling your starter, this might make sense. But for an average home baker there is simply no reason to keep that amount of starter. If you are worried about waste, just use the discard in any of my sourdough discard recipes. I hope this helps! Let me know if you have any other questions. - Anita
Kay says
Hi, are you able to use regular unbleached flour or do you need bread flour? if so is there a way to make the flour more like bread flour
anita | wild thistle kitchen says
Hi Kay. Yes you can use all purpose flour but you won't get as much of a chewy texture. It will still be a great loaf! You can also add a couple tablespoons of vital wheat gluten to the recipe if you are using AP flour. This will make the AP flour act more like a high protein bread flour. The vital wheat gluten is just an option, but you'll get good results with AP flour on its own. 🙂 Let me know how it goes! - Anita
Julie A Sickles says
Can I use all bread flour or is it necessary to use some wheat flour as well? And will it still turn out delicioius?
Julie
anita | wild thistle kitchen says
Hi Julie! Yes, you can use all bread flour and you'll end up with a very delicious loaf 🙂
Aaron says
Here I am, a 45 year old recently retired from the military guy, trying my hand at sourdough. I know, warplanes to bread is a bit strange. But, it has always been something I wanted to try and this website and recipe was perfect. I babied my starter for 8 days and just baked the most perfect looking and tasting loaf of sourdough. Thank you so much for this!
anita | wild thistle kitchen says
Hi Aaron! Your comment got me a little misty-eyed! And I quickly made my husband read it as well. This is exactly why I created this recipe and I am SO happy you had success with it. It really means a lot that you trusted my recipe and came back to leave this kind feedback. Thank you!! I wish you all the luck and success with your future sourdough endeavors! - Anita
Jane says
I just made this with my starter I made from your recipe. Oh my gracious it is beautiful and absolutely delicious! I am so excited to make more!!
anita | wild thistle kitchen says
Jane! This is the BEST news! I'm so happy this loaf worked out for you and it's even more exciting that you used my How to Make a Sourdough Starter guide to make it! Thank you so much for trusting me throughout this process and for your kind feedback! - Anita
Cherri says
Thank you for sharing your recipes. I have tried many and we have been happy with each one. They are tasty, easy to follow and very pantry friendly. I'm wondering whether this recipe can be multiplied. If so, do I simply double or triple the ingredients and I'm good to go? It would be great if I can make more than one loaf at a time of this delicious bread. Thanks again
anita | wild thistle kitchen says
Hi Cherri. Thank you so much for your kind words. I'm happy you've enjoyed my recipes. Yes, I have doubled this recipe many times with great success. I've never tripled it. I suggest doubling it in two batches so you don't have an enormous amount of dough to work with in one bowl. That way you'd have two bowls with a double batch in each. Let me know if you have any other questions and thanks again for your kind comment. - Anita
Ania says
Hi there! I have been working on my starter for several weeks and made some great discard recipes from your site! I finally tried the sourdough recipe (without a Dutch oven) and the outside of the loaf was rock hard. The inside was soft and it seemed to have good texture and taste. What did I do wrong? Any advice/suggestions??
Marie says
Wow!!! I can't believe I finally have a loaf of artisan sourdough bread that turned out! I have tried several online recipes and this is the only one that turned out perfect. The last one was so far off it wasn't even funny. It ended up in the garbage. Not kidding here. This recipe and the photos are perfect and so easy to understand. I added extra water when mixing so it would resemble closer to the photos.
anita | wild thistle kitchen says
Woohoo!! This is truly the BEST news! I was pretty nervous posting this recipe. In fact, I was so nervous even after testing it multiple times, that once I had it all typed up, I had my husband make it without any help from me. He had never baked anything sourdough before. He followed the instructions and made a gorgeous loaf! I was so proud - both of him and of myself! haha. And likewise, I am so proud of you!! Thank you very much for trusting my recipe and for sharing this excellent feedback!! - Anita
Tammy says
I have a question. I have an enamel coated cast iron and it says to keep temp at 450 or below. Can this recipe be made at that temp?
anita | wild thistle kitchen says
Hi Tammy! Enameled cast iron pots are heated to over 1500 degrees F when they are manufactured. Usually they have those heat warnings because of the lid knob. Does yours have a metal knob or is it hard black plastic? If it is plastic, you can actually just remove it when you're using it at higher temps. I replaced all of my plastic ones with metal ones years ago so I don't have to worry about it!
But yes, if you want to reduce the temp to 450 for this bread it will work just fine. You may just want to give it a little longer during the lid-off stage, like 15-20 minutes extra. Just to make sure it is baked all the way and doesn't end up gummy inside.
Let me know how it goes! Thanks - Anita