This No Yeast Sourdough Sandwich Bread loaf is tender, sturdy, and tightly crumbed - perfect for piling high with toast toppings and stuffing with sandwich fillings. The best part though is that it requires NO stretch and folds and the stand mixer does all of the hard work. This loaf is a dream come true with no special techniques, very minimal work, and hardly any hands-on time.

Recipe Background and Details
This loaf has been a long time coming and was inspired by my sourdough discard sandwich bread and my honey white sandwich bread which are two of the most popular recipes on my site. I really wanted to develop a true sourdough sandwich bread that wasn't a pain in the neck to make. Well I am proud to report that I did it! After some trial and error I think I've landed on the easiest method with the most delicious results.
This recipe does take quite a bit of time from start to finish but almost all of it is hands off. I love recipes like this because I find them so easy to fit into my day (yes, even while running a business from home with a toddler clinging to my apron strings). I also love the feeling of productivity and satisfaction knowing I have this loaf rising in the background of my day. Or going to bed knowing it's tucked away in the fridge for its overnight cold-ferment. This is the bread equivalent of a set-it-and-forget-it slow cooker recipe and I am here for it!
I think a lot of people see a recipe that takes two days and they think it will be labor-intensive and complicated. That's not the case with this and many sourdough recipes. The time is just needed for the wild yeast to do its job and to ensure that you get the fermentation benefits. Once you get used to the process you will find it can become a very natural rhythm and part of your routine. See my sample schedule below for how I fit it into my day.
Jump to:
Ingredients and Substitutions
A short list of simple ingredients are all you need to make this easy sourdough sandwich bread. The salt, honey, and butter give the bread a beautiful texture and flavor along with the tanginess from the fermentation.

- sourdough starter - you need a fed, very active, and bubbly starter at its peak for this recipe. Be sure to check out my Sourdough Starter Guide for Beginners for lots of info.
- water - room temp, tap water is fine - if your water is heavily treated be sure to use filtered water
- honey - sugar, maple syrup, or natural sweetener of choice may be used in place of the honey.
- bread flour - This really does work best with bread flour and I recommend King Arthur or an equivalent brand.
- salt - I use Diamond Crystal Kosher Salt which is much lighter than other salts. If you are using table salt or a very fine salt you will want to adjust the amount. See this salt article for more info on salt conversions.
- butter - very soft room temperature butter. Salted or unsalted are both fine.
See recipe card for quantities.
Step-by-Step Instructions
This is a very simple process and like I wrote above, almost entirely hands off.


Place wet ingredients in bowl of stand mixer, give them a stir to combine, then add flour and salt.
Knead for a minute or two until the dough comes together. Add soft butter about a tablespoon at a time while mixing. Allow each piece to incorporate before adding the next. Once all butter is added, continue kneading on speed 2 for 10 minutes. Scrape sides and form dough into a ball.


Cover dough (1st photo) and allow to rise at room temperature until doubled (2nd photo). This will take about 8 hours but could be less/more depending on your starter and the temperature of your kitchen.
Once doubled, cover and place in refrigerator overnight. You can see that the dough will rise a tiny bit more as it cold-ferments (3rd photo is the next morning).


The next morning, roll or press dough into a rectangle/oval shape about the same width as the pan and roll up tightly. Place in buttered loaf pan, cover, and allow to rise until it is just peeking above the loaf pan.


Butter generously and place in preheated oven for 50 minutes. Sometimes the butter leaks out and smokes up the oven, so I've learned to place the loaf pan on a small, parchment lined baking sheet before placing it in the oven. I also like to cover with foil after about 25 minutes to prevent the crust from becoming too browned.


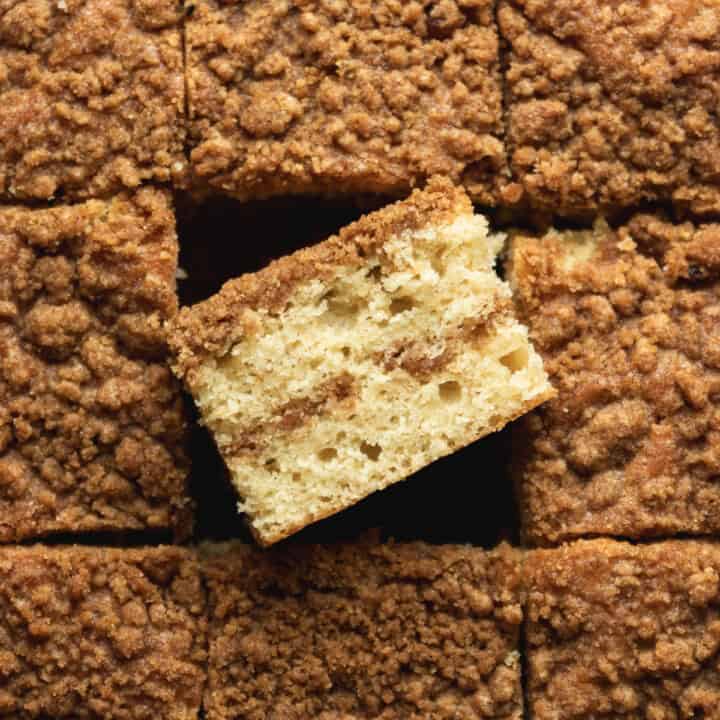
Carefully remove from pan, place on cooling rack, and allow to cool for a few hours before slicing if you can resist. In the meantime, stand back and admire those beautiful bubbles and blisters - a hallmark of good fermentation.
Baker's Timeline
This is an example of how I schedule this bread into my day. Of course you can adapt it to your schedule.
Night before starting the recipe: Feed sourdough starter. I like to do 100 grams each of starter, flour, water. *if your starter has been in the refrigerator unfed for more than a week, I'd suggest giving it 2-3 good feedings before using it in this recipe. It needs to be very strong and active.
Dough Making Day
10:00 am: Start dough
10:20 am to 7:00 pm: Bulk ferment (this could be shorter or longer depending on various factors - you are done when the dough has doubled in size)
7:00pm to 9:00 am next morning: covered in refrigerator for cold ferment
Baking Day
9:00 am: Shape loaf and place in loaf pan
9:00 am to 4:00 pm: second rise until dough has just risen above the loaf pan. (again, this could be longer or shorter for you. Let it rise until it has just risen above the loaf pan but don't let it rise more than an inch above)
4:00 pm: preheat oven and bake loaf.

Some additional tips to fit this into your schedule:
The refrigerator is your friend with this and all sourdough recipes. You can leave this dough for 24-48 hours before shaping if life gets busy. Additionally, once the loaf is shaped and in the pan it can be stashed in the refrigerator until you have time to let it fully rise at room temperature. Just be aware that the longer it ferments, even in the refrigerator, the more sour it will become. I love the tanginess of a long-fermented bread, but if you don't love super sour sourdough bread, make sure you don't let it hang out in the refrigerator too long before baking.
Additional Shaping and Rising Options
After bulk rise, shape dough and place in buttered pan. Allow to rise until dough has just risen above the edge of the loaf pan and bake straight away without the overnight cold ferment. Your dough will not be as sour and it will be a bit stickier to shape but it will turn out great.
After bulk rise, shape dough and place in pan. Cover and place in refrigerator overnight - it will rise a bit overnight. Bring back to room temperature in the morning and allow to rise until dough has just risen above the top edge of loaf pan. With this option you can let it rise half or ¾ of the way and then place in the fridge to continue the rise the next day as well.
Equipment
I use a KitchenAid Professional 7 Qt Stand Mixer to make this bread but I have also used a smaller KitchenAid Classic. 10 minutes can be a long time for some mixers, so give it a break if it seems to be struggling or overheating. This is not a stiff dough so I don't have any trouble.
To bake this sourdough sandwich bread, I used my small pullman loaf pan (without the lid) because I really love the tall, straight sides it gives the loaf and it is a nice size for sandwich bread. Feel free to use a regular loaf pan with either 9x4 or 9x5 dimensions.
This post contains affiliate links. As an Amazon Associate I earn from qualifying purchases. Please feel free to check out my full disclosure policy.
Storage
Bread will keep at room temperature in a plastic bag or sealed container for 3 days. Any longer and I would store it in the refrigerator. The bread can be frozen for up to 3 months - I recommend slicing it before freezing so you can easily remove a slice or two as needed.

Related - Sourdough Recipes
- Sourdough Discard Coffee Cake
- Sourdough Peach Cobbler
- Triple Lemon Sourdough Scones
- Sourdough Discard Waffles


Sourdough Sandwich Bread Recipe
This No Yeast Sourdough Sandwich Bread loaf is tender, sturdy, and tightly crumbed - perfect for piling high with toast toppings and stuffing with sandwich fillings. The best part though is that it requires NO stretch and folds and the stand mixer does all of the work. This loaf is a dream come true with no special techniques, very minimal work, and hardly any hands-on time.
- Total Time: 20 minutes active 8-24 hours rising/fermentation
- Yield: 1 9x4 loaf
Ingredients
240 grams water (1 cup)
200 grams active, bubbly sourdough starter (¾ cup)
42 grams honey (2 tablespoons)
510 grams bread flour (4 ¼ cups)
6 grams Diamond Crystal Kosher Salt (2 teaspoons)
60 grams very soft butter (about 4 tablespoons or ½ stick)
about 1 ounce of melted butter for brushing dough before baking
Instructions
- Place water, starter, and honey in bowl of stand mixer and mix well. Add flour and salt to this mixture.
- Mix with dough hook until dough has come together which should take about 2 minutes. It will be sticky and not smooth at this stage. Scrape down sides as needed during this stage to ensure all ingredients incorporate well.
- Add soft butter about 1 tablespoon at a time while the mixer runs. Let each addition mix in before adding the next.
- When all butter has been added, allow the dough to knead for 10 minutes on speed 2. Scrape down the sides as needed.
- Cover dough and allow to rise at room temperature until doubled in size. This will take about 8 hours at a 70 degree room temperature. You can speed it up a bit if desired by placing the dough in a warmer environment or using a bread proof setting on your oven.
- Once dough has doubled, cover and place in refrigerator overnight.
- The next morning, butter a 9x4x4 pullman loaf pan and set aside.
- Roll or pat dough into a roughly 8x12 inch rectangle/oval shape (see photos in blog post for reference)
- Beginning on the 8 inch side, roll dough tightly to form a log the same length as the pan.
- Place the dough log into the prepared pan and give it a firm squish to evenly distribute.
- Cover and let rise until dough has just risen above the edge of the pan. Do not let it go more than an inch above.
- Preheat oven to 375 with a rack in the lower 3rd of the oven.
- Brush dough with melted butter, place on a sheet tray to avoid butter dripping, and bake for 50 minutes. Cover the loaf after about 20 minutes to prevent over-browning.
- Once baked, remove from loaf pan and place on cooling rack to cool completely before slicing.
Notes
There is a wealth of detailed info and step-by-step photos in the blog post - I encourage you to read it before beginning this recipe.
Sometimes the butter leaks out and smokes up the oven, so I've learned to place the loaf pan on a small, parchment lined baking sheet before placing it in the oven.
I also like to cover with foil after about 25 minutes to prevent the crust from becoming too browned.
The refrigerator is your friend with this and all sourdough recipes. You can leave this dough in the refrigerator for 24-48 hours before shaping if life gets crazy. Additionally, once the loaf is shaped and in the pan it can be stashed in the refrigerator until you have time to let it fully rise at room temperature. Just be aware that the longer it ferments, even in the refrigerator, the more sour it will become. I love the tanginess of a long-fermented bread, but if you don't love super sour sourdough bread, make sure not to let it hang out in the refrigerator too long before baking.
Option 2: After bulk rise, shape dough and place in buttered pan. Allow to rise until dough has just risen above the edge of the loaf pan and bake straight away without the overnight cold ferment. Your dough will not be as sour and it will be a bit stickier to shape but it will turn out great.
Option 3: After bulk rise, shape dough and place in pan. Cover and place in refrigerator overnight - it will rise a bit overnight. Bring back to room temperature in the morning and allow to rise until dough has just risen above the top edge of loaf pan. With this option you can let it rise half or ¾ of the way and then place in the fridge to continue the rise the next day as well
- Prep Time: 20 minutes active
- bulk ferment: 8 hours
- Category: sourdough, bread
- Method: baking, sourdough
- Cuisine: American
Kelly says
The measurements are drastically off when comparing grams to cups.. the salt alone, 1t equals 6g salt.. not 2.. I followed the grams throughout while comparing the cups, all of them were off.. makes me not confident this recipe will work. Fingers crossed
anita | wild thistle kitchen says
Hey Kelly. Thanks for your comment. This is one of the curses of being an overly generous blogger who shares both gram and cup measurements - I get the measurement police coming after me every now and then. The way your cups measure and the way you measure is never going to be the same as how my cups measure and how I measure in my kitchen. Also, if you scoop a cup of King Arthur flour and scoop a cup of Costco flour they are not going to weigh the exact same. Measuring cup brands as well as flour brands vary quite a lot - the age of flour, the moisture level of flour - it all impacts the measurements. And regarding the salt - I specifically say that I use Diamond Crystal Kosher Salt, which does in fact weigh 3 grams per teaspoon. If you look under the Ingredients and Substitutions heading I provide this detailed info: salt - "I use Diamond Crystal Kosher Salt which is much lighter than other salts. If you are using table salt or a very fine salt you will want to adjust the amount. See this salt article for more info on salt conversions." There are just so many variables that go into how a specific ingredient measures. This is why along with providing both types of measurements, I also provide step-by-step photos and detailed instructions of how the dough should look and feel. If I only provide gram measurements, I would never run into comments like this but I'd also leave out a whole population of bakers who don't have a scale or who simply prefer cup measurements. I guess I do this because I grew up baking without a scale alongside my grandma and we made some really wonderful things together.
But having written all of that, I tested this recipe with both types of measurements multiple times before publishing it and it is a recipe I still make frequently. And as you can see in the comments, this recipe does work for those who have tried it. Let me know if this helps clear up any questions you have regarding volume and metric measurements and please do let me know how the bread turns out for you. Thanks - Anita
Amy says
I can't begin to explain how delicious this bread was! I wanted to omit the butter but thank goodness I didn't. It makes for the most amazing slice of toast I think I have ever had! I'd love to take this as a base recipe and tweak it a bit to be a whole wheat sandwich loaf, or at least part whole wheat. I'd like to try adding some seeds as well! I've already shared this recipe with at least three other bread lovers I know!
Kathy says
This recipe makes the BEST sandwich bread. You won’t go wrong with this recipe. So happy to have found Wild Thistle Kitchen. I’m not buying bread again.
Shaundi says
I had been looking for an easy sandwich bread recipe. After reading through several, yours it seemed to fit the bill so I decided to give it a try! It’s a keeper!!
It took some creative planning, but being able to leave it in the fridge was a huge help. Besides, I like the extra tang of a good sourdough!
What a lovely loaf of bread I got out of this recipe!
Thank you!
Linda says
Can this recipe be doubled for two loaves?
anita | wild thistle kitchen says
Hi Linda. Yes, it doubles nicely and I do that often at home. I feel like it's just as easy to make two loaves so why not save some time! 🙂 - Anita
Deb Lueders says
Finally! Sourdough recipes in simple terms and steps! I made the sandwich bread and it turned out perfectly perfectly. i appreciate the simplicity, and your advice to use the fridge as my friend, which I did.
I look forward to trying your other recipes.
Deb
Linda says
Thanks Anita. Another question. Can I omit putting the honey, sugar, maple syrup in the recipe or will it affect the rising?
anita | wild thistle kitchen says
Hi Linda. Omitting the sweetener will not impact the rise. It is just for flavor and softness. 🙂
Lori says
Hi Anita,
I only have 8.5x4.5x2.75 pans. Do you have a suggestion for changes to make to the recipe?
anita | wild thistle kitchen says
Hi Lori! That size will work just fine. You will get an extra puffy and domed top. 🙂
Lori says
I made the recipe and it turned out great. I do have a bulk fermentation question though. When measuring, do you count the top of the dome or where it's touching the side?
anita | wild thistle kitchen says
Hi Lori! I'm glad this recipe turned out well for you! For bulk fermentation I usually measure where it touches the side. And for the loaf pan rise, I measure the dome. Let me know if you have any other questions. Thanks! - Anita
Kellen says
This is my go-to, all time favorite sourdough bread recipe. If I made this recipe with white whole wheat flour, what modifications, if any, would you make to the recipe?
Thank you!
anita | wild thistle kitchen says
Hi Kellen! Thank you! I am so happy to read this!! I'd start with 50/50 white whole wheat to bread flour and see how you like it. If you did 100% you'd still get a nice loaf but it may be a little dense. If you do end up using all white whole wheat don't add the full amount of flour right away. Maybe do 3 1/2 cups, let it rest so the flour can absorb the liquid, then see if it is very sticky still and add a bit more flour as needed. The whole wheat takes a bit longer to hydrate which is why I recommend the resting period. Let me know if you have any other questions and thanks again for this great comment!! - Anita
Dee Van Horne says
OMG! This is the first time my sourdough loaf looked edible and perfect for a sandwich! I am in love with this recipe! I have been trying all different sourdough bread recipes and this one rocks! Thank you so much! Please write a book!